I have been, or can be if you click on a link and make a purchase, compensated via a cash payment, gift, or something else of value for writing this post. As an Amazon Associate, I earn from qualifying purchases. Please read my full Affiliate Disclosure for more information.
Ever wonder how a simple touch of molding can completely transform the vibe of a room? Wall molding design has soared in popularity because it effortlessly adds character, elegance, and a polished look to any space—whether you’re aiming for classic charm or modern minimalism. These decorative elements not only elevate interior aesthetics but also create architectural interest, making your home feel more curated and stylish.
In this article, you’ll discover a treasure trove of inspiring ideas and practical tips to elevate your walls with stunning molding designs. From timeless crown moldings to bold geometric patterns and cozy beadboard accents, there’s a style for every taste and space. Get ready to explore diverse options that range from vintage elegance to contemporary chic, helping you craft interiors that truly stand out!
1. Classic Crown Molding for Elegant Ceilings
Adding crown molding is like giving your ceiling a beautifully tailored frame—instantly elevating the room’s sophistication and timeless charm. It’s a classic detail that never goes out of style, perfect for creating an upscale, polished atmosphere.
Recommended Products to replicate this idea
| # | Preview | Product | |
|---|---|---|---|
| 1 |

|
Art3d 10-Pack 47Ft White Ceiling Crown Molding Trim, High Impact Polystyrene Decorative Ceiling... | Check Latest Price |
| # | Preview | Product | |
|---|---|---|---|
| 1 |

|
Metabo HPT 10-Inch Compound Miter Saw, 15-Amp Power Saw with Large 10-Inch Table, Precision Miter... | Check Latest Price |
Imagine a gracefully curved or intricately carved crown molding, painted in crisp white or a subtle hue that complements your ceiling and walls. The molding spans the perimeter of the room, where the wall meets the ceiling, with delicate patterns or simple profiles that enhance the height and grandeur.
The design can feature ornate scrollwork, floral motifs, or clean lines, depending on your aesthetic. When paired with soft lighting, the molding casts gentle shadows that add depth and warmth, making the space feel luxurious and inviting.
The air might subtly carry a hint of wood or paint scent, emphasizing craftsmanship and quality. Getting started is straightforward: measure your room’s perimeter accurately, then select a crown molding profile that suits your style—whether ornate or minimalist.
Purchase pre-primed or painted molding for easy installation. Use a miter saw to cut the pieces at appropriate angles, then attach them securely to the wall and ceiling with nails or adhesive.
Finish with caulking and paint or stain to match your decor. For a simpler DIY, foam or polystyrene moldings can mimic the look at a lower cost and are easier to work with, making this elegant upgrade accessible to many.
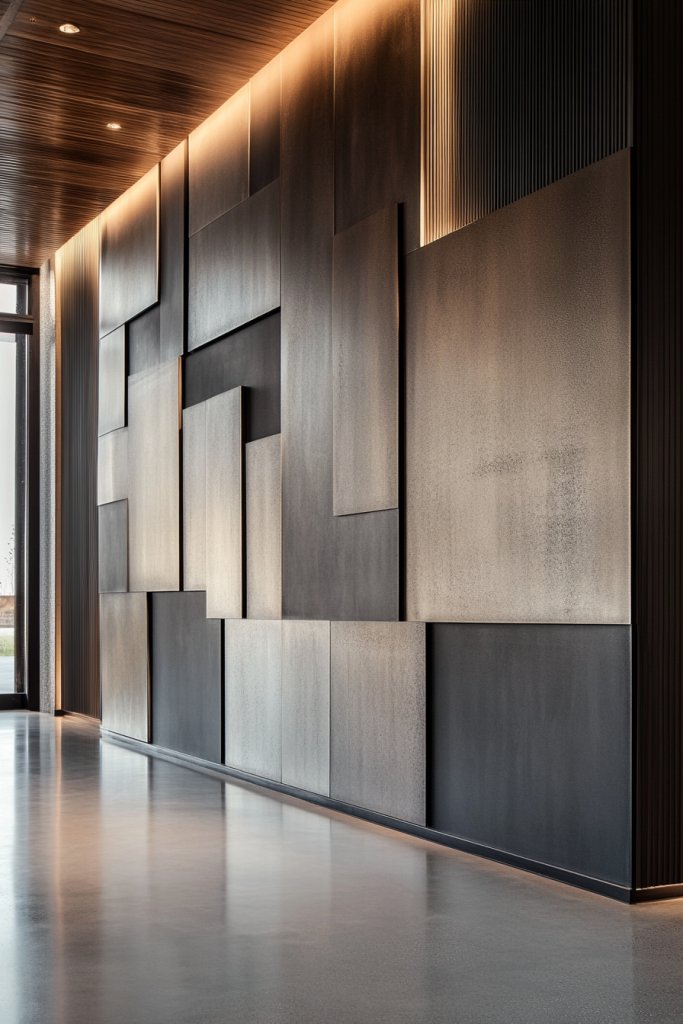
2. Modern Flat Wall Panel Molding for Sleek Minimalism
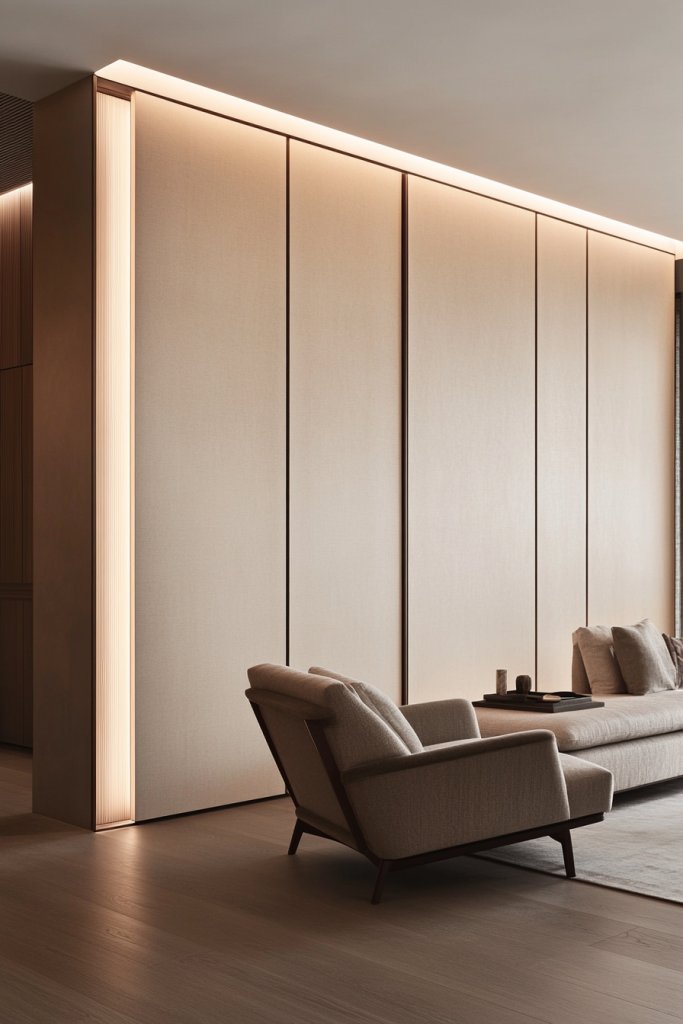
Flat wall panel molding offers a clean, streamlined aesthetic that embodies contemporary minimalism. It’s a subtle yet impactful way to add architectural interest without overwhelming the space, perfect for modern homes aiming for a sleek vibe.
Recommended Products to replicate this idea
| # | Preview | Product | |
|---|---|---|---|
| 1 |

|
Pangda Peel and Stick Wall Molding Kit, 3D Premade Accent Molding Wainscoting Panel for Interior... | Check Latest Price |
| # | Preview | Product | |
|---|---|---|---|
| 1 |
|
Metabo HPT 10-Inch Compound Miter Saw, 15-Amp Power Saw with Large 10-Inch Table, Precision Miter... | Check Latest Price |
Visualize a wall divided into large, rectangular or square panels created by narrow, flat strips of molding painted in a matching or contrasting color—think crisp white panels against a soft gray wall or bold black borders for dramatic effect. The flat profiles sit flush with the wall, emphasizing smooth surfaces and sharp lines, while the subtle shadows cast by the edges give a hint of depth.
This design creates a structured, organized look that feels both fresh and calming. The textures are smooth, with matte or semi-gloss finishes that reflect light softly, enhancing the room’s spaciousness and clarity.
To implement this look, measure your wall and sketch out your panel layout, then cut your molding strips accordingly. Use wood or MDF for affordability and ease of installation—these can be painted or stained to match your decor.
Attach the strips with a strong adhesive or nails, ensuring they are perfectly aligned and level. Fill gaps with caulk, sand smooth, and paint for a seamless finish. For a quick upgrade, pre-made panel molding kits are available and simplify the process, making it an achievable project even for DIY novices.
3. Wainscoting with Beadboard Details for Cozy Charm
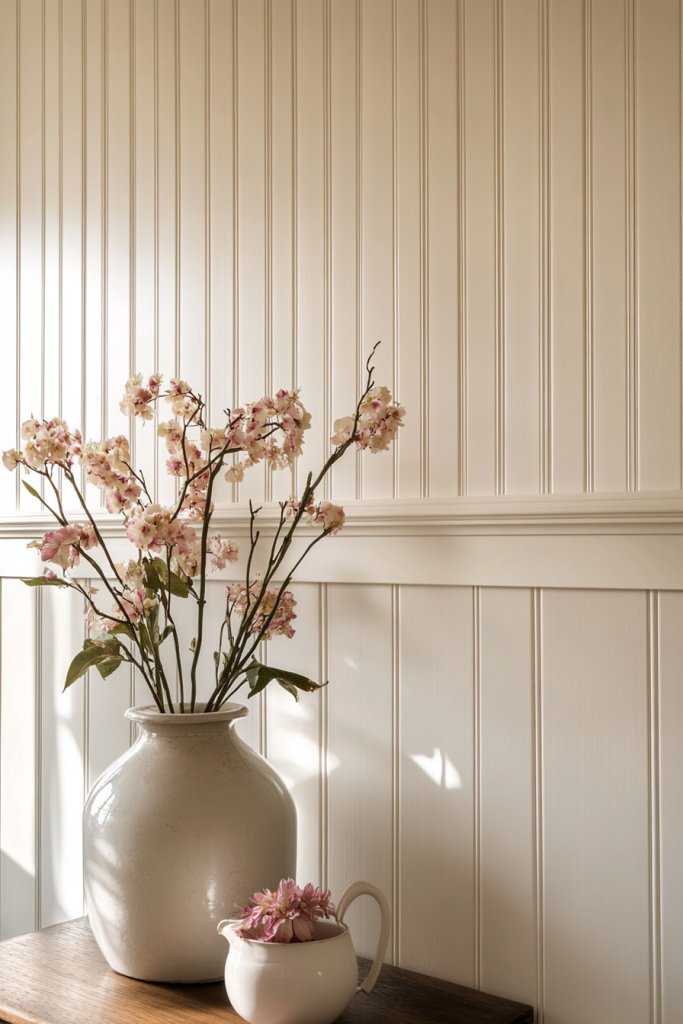
Wainscoting with beadboard adds a warm, inviting texture to your walls, creating a traditional or cottage-inspired look that feels cozy and timeless. It’s ideal for transforming dining rooms, living areas, or entryways into charming retreats.
Recommended Products to replicate this idea
| # | Preview | Product | |
|---|---|---|---|
| 1 |
|
Graham & Brown Paintable Pre-Pasted Beadboard Wallpaper | Check Latest Price |
| # | Preview | Product | |
|---|---|---|---|
| 1 |

|
QDYMXUN Peel and Stick Chair Rail Panel Molding, 240''L x 1.06''W Strong Self Adhesive TPE Wall... | Check Latest Price |
Picture a wall covered with vertical beadboard panels painted in soft whites, creams, or pastel shades, topped with a sleek chair rail. The beadboard’s narrow, rounded grooves catch the light, adding subtle shadow and tactile interest, while the paneling itself lends a sense of craftsmanship and history.
The combination of textured wood and smooth paint creates a cozy, tactile experience—almost as if the room is embracing you. The overall effect is warm and welcoming, perfect for enhancing a rustic, vintage, or shabby-chic style.
Start by measuring the wall area and choosing the appropriate beadboard panels—either pre-primed or natural wood. Cut panels to fit, then attach them to the wall with nails or adhesive, making sure they’re level.
Install a chair rail at the desired height to frame the panels, then fill any gaps or nail holes with wood filler. Finish by painting or staining the beadboard and trim, sealing the look with a clear protective coat if needed. For an easier option, peel-and-stick beadboard wallpaper offers the textured look without the fuss of cutting and installing real wood panels, making this charming upgrade accessible for all skill levels.
4. Geometric Wall Molding for a Bold Statement
Geometric wall molding transforms plain walls into modern art pieces with striking patterns that command attention. It’s perfect for adding a contemporary, edgy vibe to your space.
Recommended Products to replicate this idea
| # | Preview | Product | |
|---|---|---|---|
| 1 |

|
Art3d 10 Ft Peel and Stick Flexible Vinyl Molding Trim for Wall Tile Edges, Kitchen backsplash,... | Check Latest Price |
| # | Preview | Product | |
|---|---|---|---|
| 1 |
|
Metabo HPT 10-Inch Compound Miter Saw, 15-Amp Power Saw with Large 10-Inch Table, Precision Miter... | Check Latest Price |
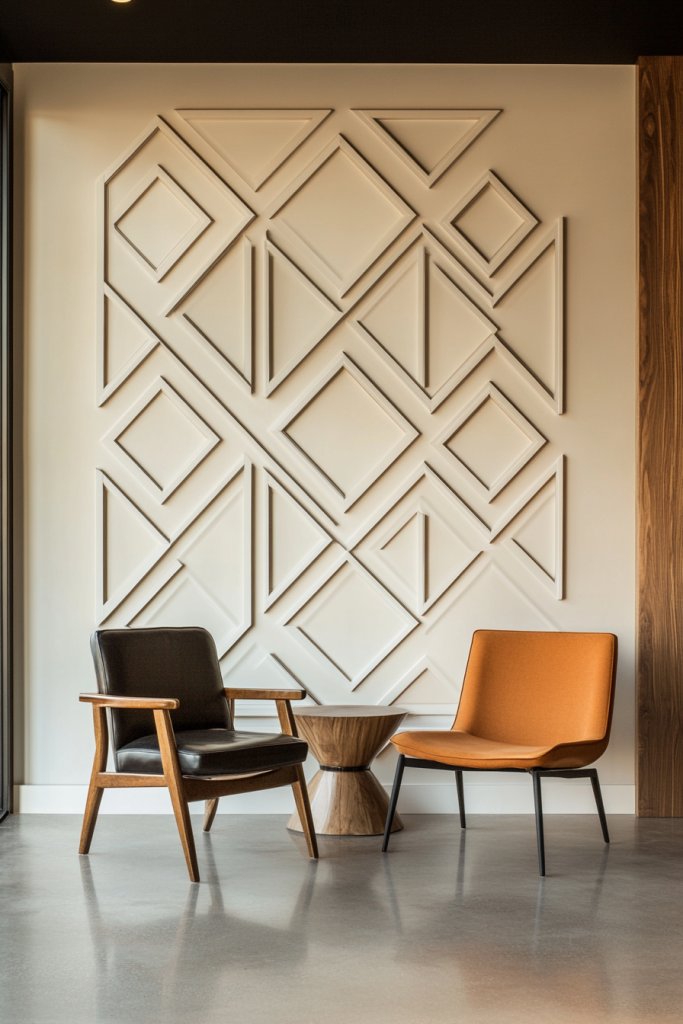
Visualize a wall decorated with a series of interconnected squares, diamonds, or hexagons formed by narrow, precise strips of molding. These shapes are often painted in contrasting colors—such as black and white or metallic accents—creating a vibrant, graphic impact.
The clean lines and sharp angles highlight your room’s architectural features, giving it a modern, almost sculptural feel. The textures are minimal, with smooth surfaces and crisp edges, but the visual pattern creates a layered, dynamic depth that energizes the space.
When lit with directional lighting, these geometric shapes cast interesting shadows, further enhancing their bold presence. To bring this idea to life, sketch your pattern on the wall and measure carefully before cutting your molding strips—commonly wood, PVC, or foam—to ensure precise angles.
Use a miter saw or corner blocks for perfect joints, then attach the pieces with nails or adhesive. Paint or finish the molding in your chosen colors, and consider using painter’s tape for sharp edges. For a beginner-friendly approach, pre-cut geometric molding kits or stencil patterns can simplify the process, making it easy to create a striking, modern feature wall without specialized skills.
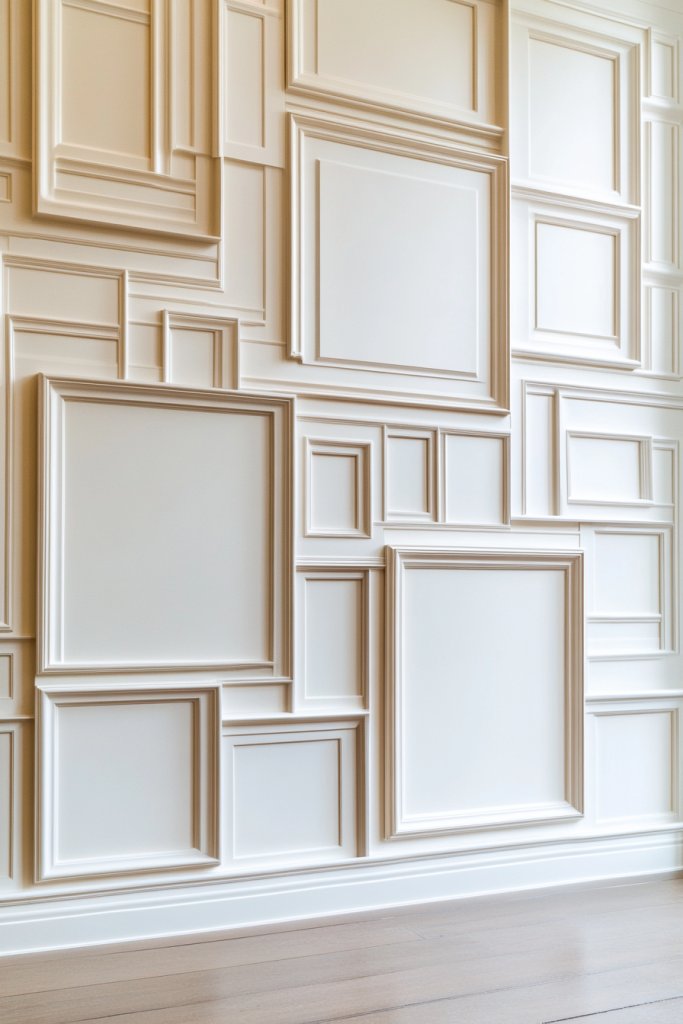
5. Picture Frame Molding for a Gallery Wall Effect
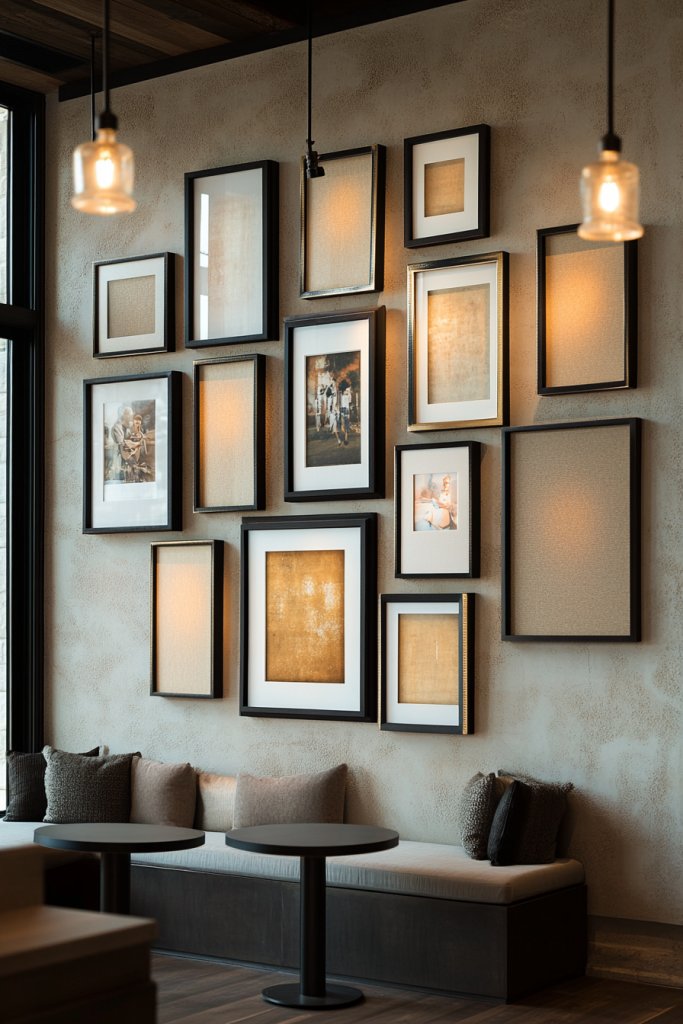
Picture frame molding turns sections of your wall into mini art galleries, framing artwork, photographs, or decorative panels for a curated, sophisticated look. Imagine a series of rectangular or square frames, crafted from narrow molding strips, arranged symmetrically or randomly across the wall.
Recommended Products to replicate this idea
| # | Preview | Product | |
|---|---|---|---|
| 1 |

|
Art3d Premade Bilinear Frame Accent Molding Set, Pre-Cut Decorative Wainscoting Panel for Home... | Check Latest Price |
| # | Preview | Product | |
|---|---|---|---|
| 1 |
|
CRAFTSMAN Mitre Saw, 12-Inch Saw & Clamping Box (CMHT20600) | Check Latest Price |
The frames are painted in neutral tones or bold contrasts—like matte black, crisp white, or metallic gold—to draw the eye and create focal points. Inside each frame, you can display artwork, photos, or simply leave the space empty for a modern, minimalist vibe.
The molding’s crisp edges and smooth surfaces provide a clean, tailored appearance, transforming bland walls into curated spaces full of personality. When illuminated with soft, ambient lighting, these framed sections create a gallery-like ambiance that feels both stylish and inviting.
Begin by measuring and marking your wall to plan the layout. Cut the molding into strips—wood or MDF work well—and assemble the frames with mitered corners, securing with nails or strong adhesive.
Attach the frames to the wall using nails or mounting strips, then paint or stain them to match your decor. For added flexibility, use removable picture hanging strips inside each frame, making it easy to swap out artwork or photos. This project is highly adaptable and perfect for DIY enthusiasts who want a personalized, artful touch without complex carpentry skills.
6. Chair Rail Moldings for Classic Dining Rooms
Adding chair rail moldings is a timeless way to enhance the elegance of your dining space, providing both style and practicality. This detail creates a visual break on the wall that elevates the room’s architecture, making it feel more polished and refined.
Recommended Products to replicate this idea
| # | Preview | Product | |
|---|---|---|---|
| 1 |
|
QDYMXUN Peel and Stick Chair Rail Panel Molding, 240''L x 1.06''W Strong Self Adhesive TPE Wall... | Check Latest Price |
| # | Preview | Product | |
|---|---|---|---|
| 1 |

|
Art3d Premade Board and Batten Paintable Wainscoting Kit, MDF Accent Wall Panel for Kitchen... | Check Latest Price |
Imagine a crisp white chair rail running horizontally around the room, dividing a soft, muted wall color like pale blue or warm beige. The molding is about 3-5 inches high, with a smooth or subtly decorative profile that catches the eye without overwhelming the space.
Below, you might have a darker or contrasting paint, such as charcoal gray or deep navy, which adds depth and sophistication. The textured wall surface, paired with polished wood or painted molding, invites a tactile experience that feels both inviting and upscale.
The overall effect is cozy yet elegant, perfect for entertaining or everyday family meals. To recreate this look, start by measuring your wall height to determine the ideal placement for the chair rail—usually at about one-third of the wall height.
Use painter’s tape to mark a straight line around the room. Choose wooden or MDF molding, which can be found pre-primed and ready to paint or stain.
Secure the molding with finishing nails, then fill and sand any gaps or nail holes. Finish with a coat of paint in your chosen contrasting color or a classic white for a timeless look.
For a more budget-friendly option, consider PVC or foam moldings that are lightweight and easy to install. This simple addition instantly elevates your dining room’s style with minimal effort.
7. Half-Wall Molding with Color Contrast for Visual Depth
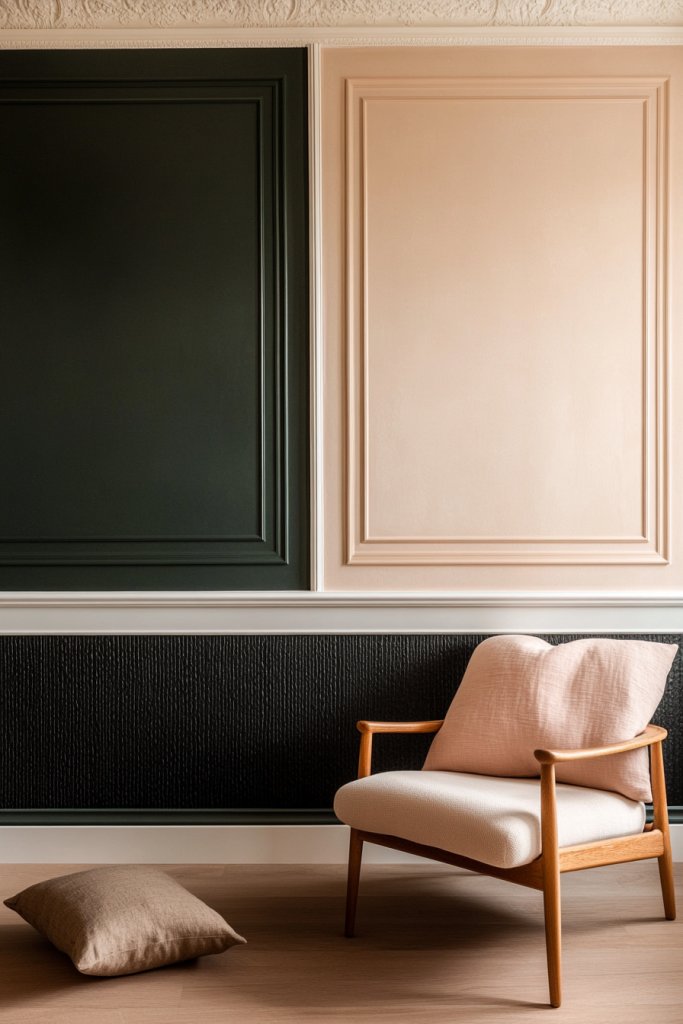
Half-wall molding is a clever technique that adds dimension and architectural interest to any room by breaking up large wall spaces. When paired with contrasting paint colors, it creates a striking visual effect that makes the ceiling feel higher and the space more dynamic.
Recommended Products to replicate this idea
| # | Preview | Product | |
|---|---|---|---|
| 1 |
|
Art3d 10 Ft Peel and Stick Flexible Vinyl Molding Trim for Wall Tile Edges, Kitchen backsplash,... | Check Latest Price |
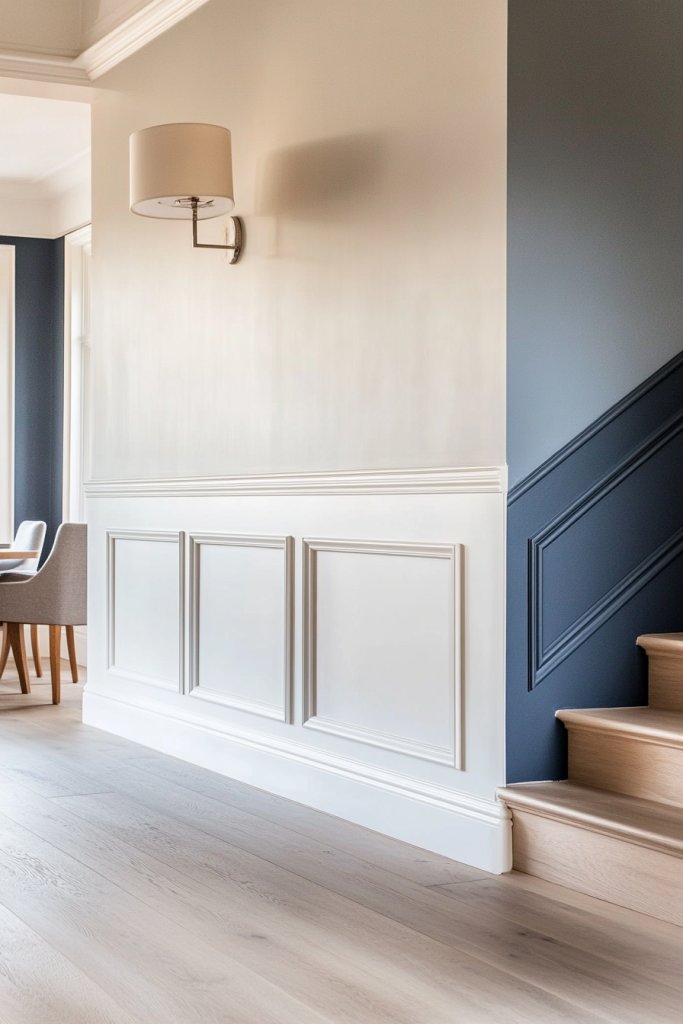
Visualize a room where the bottom half of the wall is painted a rich charcoal or deep emerald, while the upper part remains a soft, airy hue like blush pink or warm cream. The molding, placed roughly at waist height, is painted in a bright white or metallic finish, acting as a clean divider between the two shades.
The textured surface of the lower wall, combined with the smooth upper section, invites your eye to explore the space’s layers. The contrast in colors and the crisp lines of the molding give an illusion of depth, making the room appear larger and more layered.
The tactile quality of the painted surfaces, along with the visual sharpness of the molding, creates a balanced, sophisticated environment. To implement this, start by choosing two complementary paint colors—consider a dark, bold shade for the bottom and a light or neutral tone for the top.
Measure and mark the desired height for the molding, typically at about 36 inches from the floor, then install a sturdy wood or MDF molding strip along this line. Use painter’s tape to ensure a straight, clean edge when painting different colors on each section.
For a seamless finish, apply painter’s caulk along the edges of the molding before painting. This technique is adaptable for various room sizes and styles, from modern to traditional, and can be achieved easily with basic painting supplies and some careful tape work.
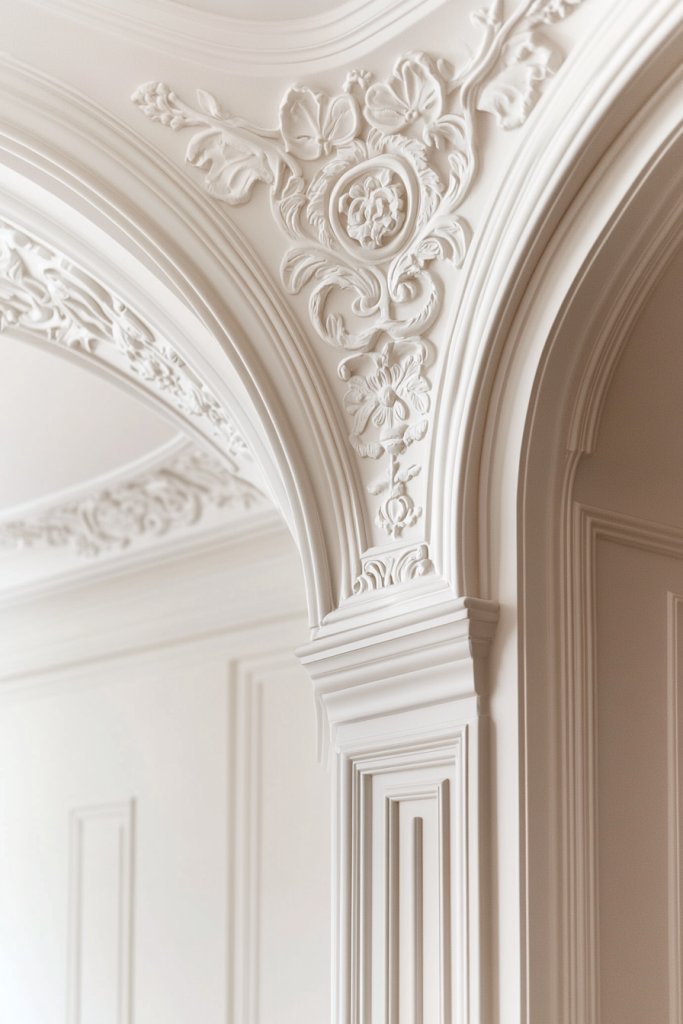
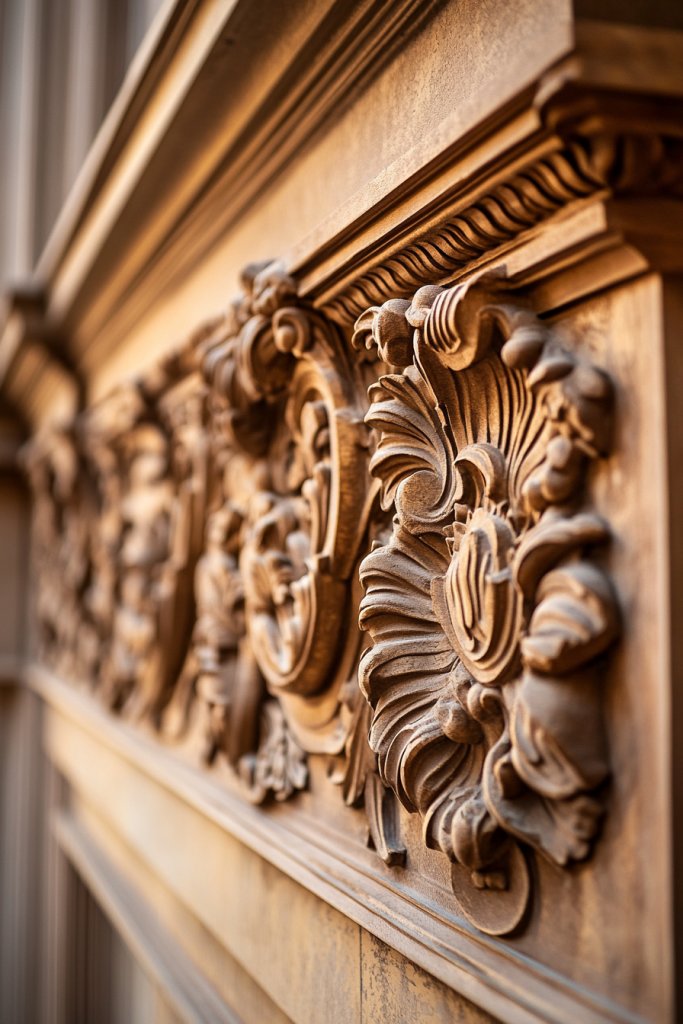
8. Ornate Victorian-Style Molding for Vintage Elegance
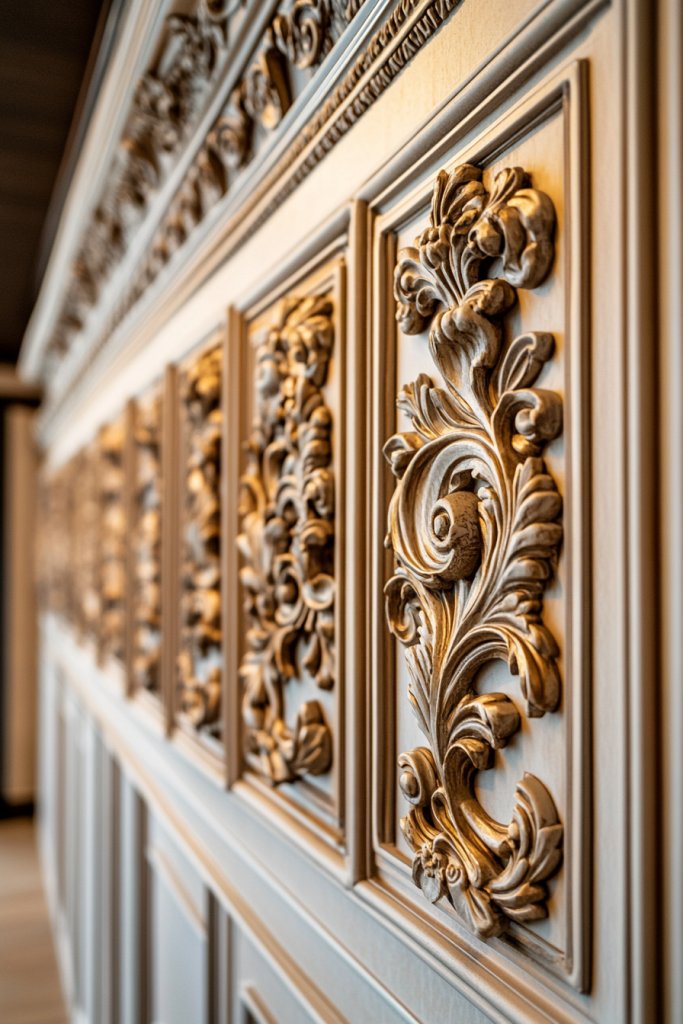
Victorian-style molding is all about intricate detail and craftsmanship, bringing a sense of historical grandeur and luxury into modern interiors. This type of molding features elaborate carvings, floral motifs, and decorative scrollwork that evoke Victorian opulence.
Recommended Products to replicate this idea
| # | Preview | Product | |
|---|---|---|---|
| 1 |
|
Endurathane Edinburgh Crown Moulding, 4"H x 2 3/8"P x 4 5/8"F x 94 1/2"L, Factory Primed | Check Latest Price |
| # | Preview | Product | |
|---|---|---|---|
| 1 |

|
TUP The Urban Port Floral Hand Carved Wooden Wall Panels, Assortment of Two, Rustic Brown | Check Latest Price |
Picture a wall adorned with richly detailed crown moldings, featuring scrolls, acanthus leaves, and floral accents in a warm gold or antique white finish. These ornate moldings frame the ceiling or create decorative panels on the wall, adding a sense of depth and richness.
The textured carvings catch the light, creating subtle shadows and highlighting the craftsmanship. The overall effect is one of vintage elegance, transforming a plain wall into a statement piece full of character and history.
To achieve this look, start by sourcing pre-cast or custom-carved Victorian-style moldings from specialty suppliers or antique stores. If DIY is preferred, you can purchase simpler, less detailed moldings and add decorative elements with plaster or resin embellishments.
Install the moldings using finishing nails and adhesive, ensuring they are securely attached and seamlessly joined. Finish with an antique white or metallic paint, or even a distressed finish to emphasize age and charm. This style works best in spaces with high ceilings and classic furnishings, but can be modernized with a fresh coat of paint or simplified details for a more subtle vintage touch.
9. Shadow Box Molding for Depth and Texture
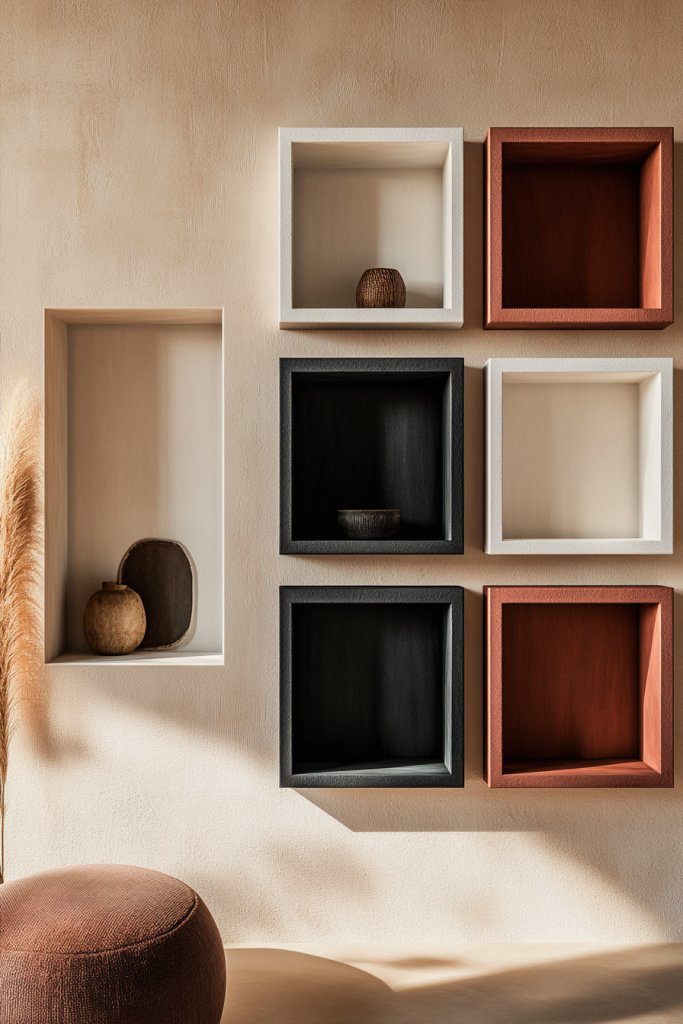
Shadow box molding creates a layered, three-dimensional effect on your walls, adding both depth and visual intrigue. This design technique involves building recessed or protruding frames within the wall, giving a gallery-like appearance and a tactile dimension that invites closer inspection.
Imagine a series of rectangular or square shadow boxes, each about 4-6 inches deep, painted in contrasting shades such as matte black with a white interior or a bold jewel tone against a neutral background. The boxes cast subtle shadows that change with the natural light, giving the wall a dynamic, textured quality.
The layered effect makes the wall feel more sculptural and sophisticated, perfect for showcasing decorative objects or simply adding architectural interest to a plain surface. To create shadow box molding, start by planning your layout and measuring the dimensions of each frame.
Cut wood or MDF strips to size, then assemble the boxes using nails or adhesive, ensuring they are square and level. Attach the completed shadow boxes to the wall with strong fasteners, spacing them evenly for a balanced look.
Finish by painting the interior and exterior of each box in your chosen colors, and add decorative objects or lighting inside for a personalized touch. This project is accessible for DIY enthusiasts with basic carpentry skills and offers a dramatic upgrade for living rooms, hallways, or bedrooms.
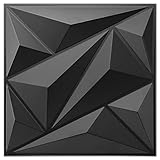
10. Modular Molding Systems for Customizable Styles
Modular molding systems offer a versatile, user-friendly way to experiment with different wall designs without a permanent commitment. These kits typically include interchangeable panels, trims, and decorative elements that can be combined in countless ways to suit your style and space.
Recommended Products to replicate this idea
| # | Preview | Product | |
|---|---|---|---|
| 1 |
|
Art3dwallpanels 33 Pack 3D Wall Panel Diamond for Interior Wall Décor, PVC Flower Textured Wall... | Check Latest Price |
| # | Preview | Product | |
|---|---|---|---|
| 1 |

|
Pluden 20FT Flexible Wall Corner Protector Moulding Trim, Peel and Stick Inside & Outside Wall... | Check Latest Price |
Envision a sleek, modern wall featuring a mix of rectangular and geometric panels, finished in matte black or metallic finishes for a contemporary vibe. The modular components snap or slide into place, allowing you to easily swap out or rearrange sections whenever you want a new look.
This system provides endless options—from simple linear patterns to intricate mosaics—making it ideal for renters or those who love to update their decor frequently. To get started, select a modular molding kit compatible with your space, ensuring it includes essential components like panels, corner trims, and connectors.
Measure your wall carefully and plan your layout, then follow the manufacturer’s instructions to assemble and install the pieces, using minimal tools such as a drill and level. You can customize the design further by painting or finishing individual modules in different colors or textures. These systems are perfect for creating personalized, layered wall accents that can evolve with your style over time, all while being straightforward enough for DIY installation.
11. Rustic Barn Wood Molding for Country Charm
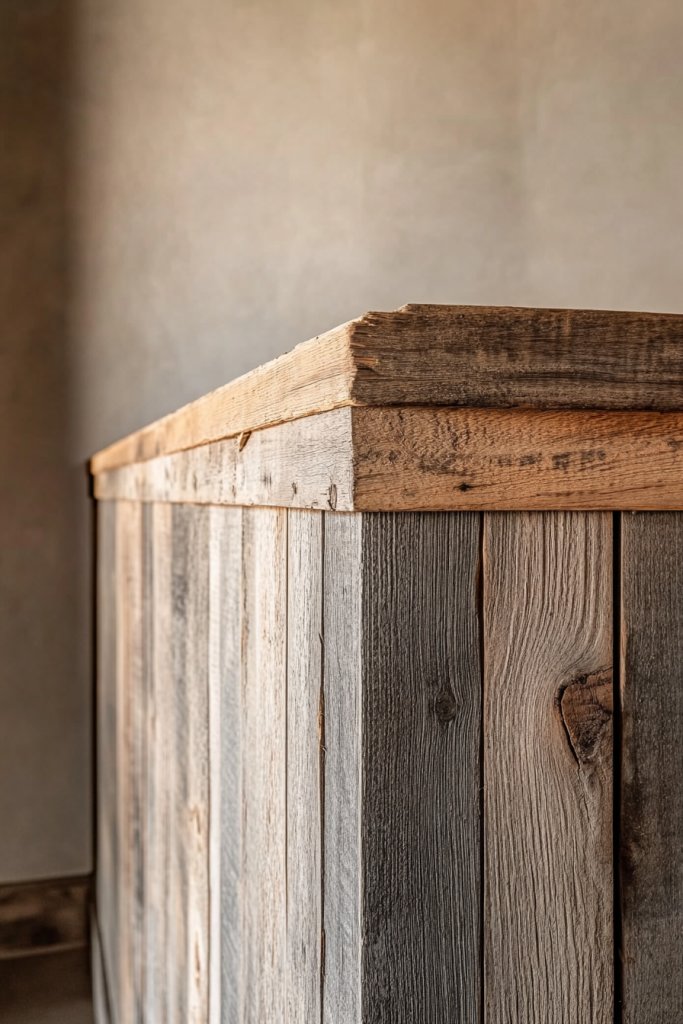
Transform your space with the warm, inviting vibe of rustic barn wood molding, perfect for adding country charm to any room. This design taps into the cozy, nostalgic feeling of farmhouse interiors, blending natural textures with timeless appeal.
Whether you’re aiming for a casual cottage look or a vintage-inspired retreat, barn wood molding offers a versatile and stylish solution. Imagine planks of reclaimed wood with rich, weathered finishes—soft gray, warm honey, or deep charred hues—carefully installed along your walls.
The rough-hewn texture of the wood contrasts beautifully with smooth painted walls, creating a tactile and visual layered effect. The scent of aged wood and the sight of uneven grain and knots evoke a sense of history and craftsmanship, transforming your walls into a rustic statement.
This molding can run along the top of wainscoting or be used as an accent strip, adding depth and character to the room’s architecture. Getting started is straightforward: choose reclaimed or faux barn wood planks that match your color scheme.
Measure and cut the planks to fit your wall length, then attach them with finishing nails or heavy-duty adhesive. For a more budget-friendly option, faux wood molding made from MDF or PVC can mimic the look at a lower cost.
Sand the edges slightly for authenticity, and finish with a clear sealant or matte paint to preserve the rustic charm. With basic tools and patience, you can craft a stunning country-inspired wall that feels both crafted and cozy.
12. Pilaster and Plinth Molding for Architectural Grandeur
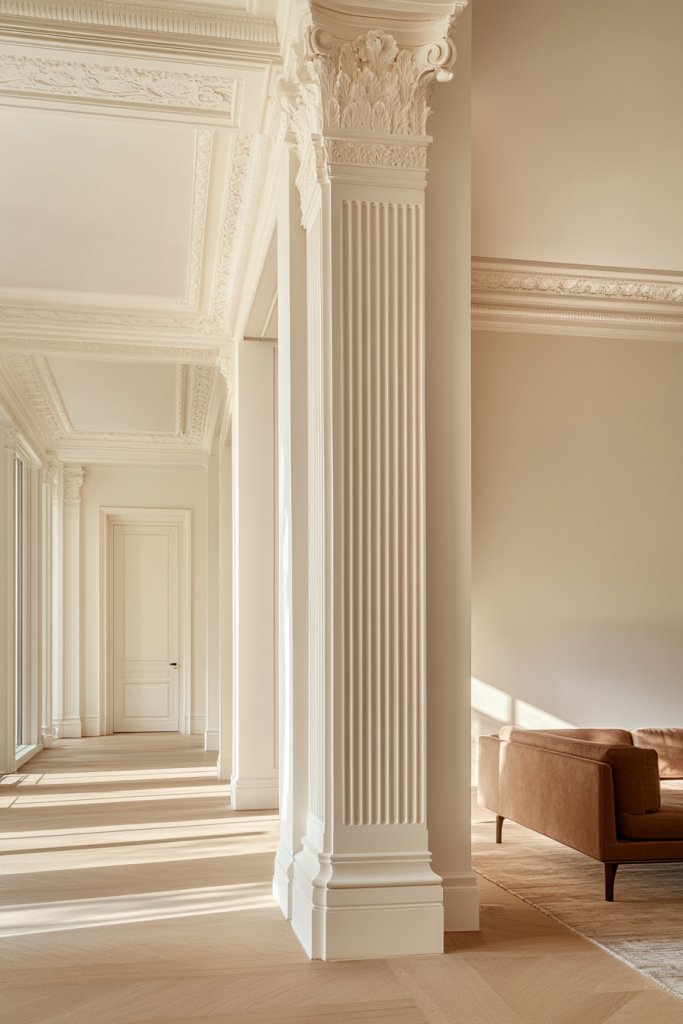
Add a touch of classical elegance and architectural interest with pilaster and plinth moldings, transforming plain walls into grand, column-like features. These elements evoke the grandeur of historic buildings and stately homes, offering a sophisticated focal point that elevates your space’s style and stature.
Visualize tall, rectangular pilasters with detailed capitals, paired with sturdy plinth bases at the bottom—often finished in crisp white or muted neutrals. These moldings frame doorways or create faux columns that give your room a sense of depth and dimension.
The smooth, clean lines of modern versions can complement contemporary interiors, while ornate designs with intricate carvings lend vintage or Victorian flair. The overall effect is one of permanence and majesty, making your walls resemble classical architecture.
When lit properly, these features cast subtle shadows, emphasizing their form and craftsmanship. To implement, start by selecting pre-made pilaster and plinth molding from your local home improvement store or online.
Measure the height and width of your desired feature, then cut the moldings with a saw—using miter cuts for corners and joints. Attach them securely with construction adhesive or nails, making sure they are level and flush.
Finish with caulk and paint in your chosen color to hide seams and create a polished look. For a more authentic feel, add decorative trim or details, and ensure your wall surface is smooth and clean beforehand. With some basic carpentry skills, you can craft an elegant, architectural masterpiece in your own home.
13. Curved and Arched Molding for Soft Architectural Lines
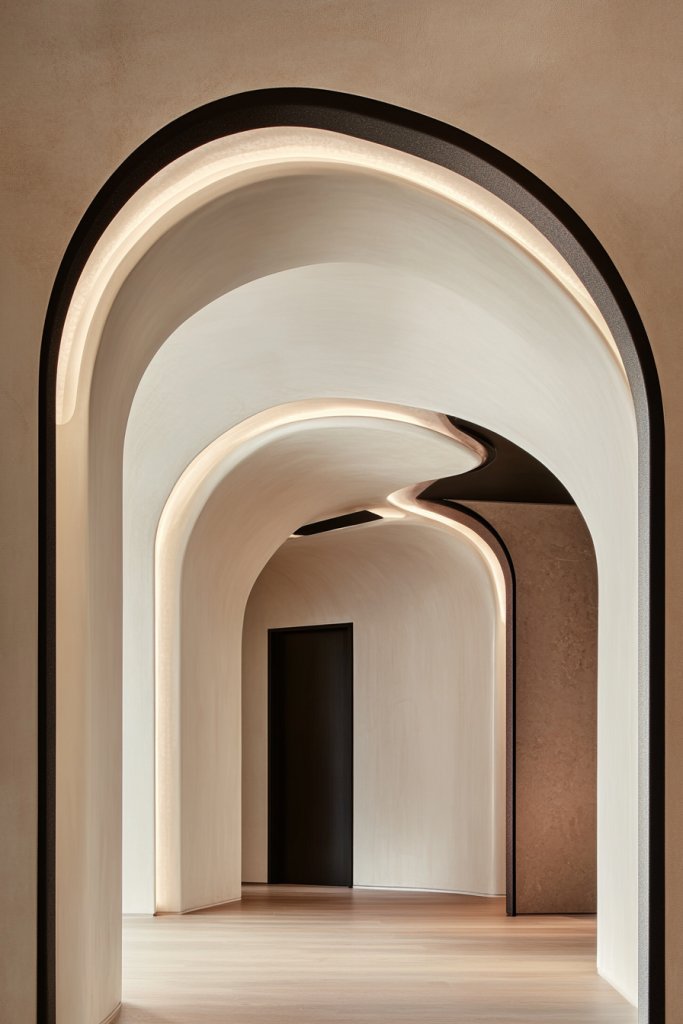
Introduce a sense of grace and fluidity with curved or arched molding, gently softening space transitions and adding architectural elegance. This design element lends a refined, sophisticated look to hallways, doorways, or alcoves, making your space feel more inviting and artistically crafted.
Picture smooth, sweeping arches or soft curves crafted from flexible trim or custom-cut molding. These elements can frame doorways or ceiling niches, creating seamless, organic lines that contrast with traditional straight edges.
The molding might be finished in glossy white, matte black, or metallic tones, depending on your decor style, and can be accented with subtle decorative details or kept minimalist for a modern touch. The tactile quality of curved molding adds visual interest and a sense of movement, making your walls appear more dynamic and elegant.
Start with flexible trim strips designed for curves, available at most hardware stores, or have custom pieces cut at a millwork shop. Use a template or painter’s curve to mark your desired arch on the wall, then cut and fit the molding accordingly.
Attach with construction adhesive and finishing nails, ensuring a smooth, precise curve. Fill any gaps with caulk and paint or stain to match your decor.
For a polished look, consider adding subtle LED lighting behind the arch for a soft glow. With careful planning and a little patience, you can create stunning, soft architectural lines that elevate your space’s style and atmosphere.
14. Metallic Accents on Molding for a Glamorous Touch
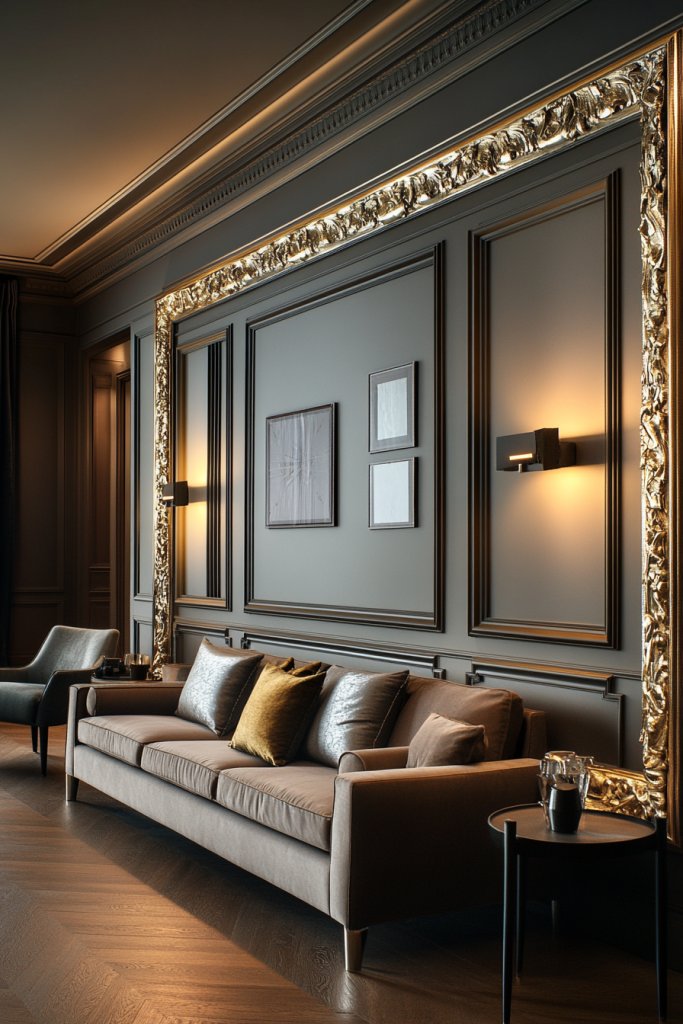
Infuse your walls with luxury and sparkle by adding metallic accents to your moldings, transforming everyday trim into glamorous focal points. This high-shine detail catches light beautifully, elevating your interior design with a touch of opulence and modern sophistication.
Imagine moldings painted in or coated with gold leaf, silver, or metallic bronze—or simply brushed with metallic paint for a subtler shimmer. The reflective quality of these accents draws the eye and creates a luxurious ambiance, especially when paired with neutral or dark wall colors.
Textured finishes, such as metallic leafing or high-gloss paint, add depth and tactile interest, making your moldings feel like jewelry framing your walls. The effect is both contemporary and vintage, depending on your palette and style choices, adding a layer of richness and visual intrigue to your room.
To achieve this, select metallic paint or leafing materials from craft or home improvement stores. Prepare your moldings by cleaning and priming the surface, then apply metallic paint with a foam brush or adhesive for gold leaf applications.
To create a more dramatic effect, combine matte and shiny finishes or add glitter accents. Seal with a clear topcoat for durability. Whether framing a mirror, accenting a wall, or highlighting crown molding, metallic accents instantly elevate your design, making your space feel more glamorous and refined with minimal effort.
15. Multi-Layered Molding for Dynamic, Layered Effects
Create a rich, textured look by layering different types and sizes of moldings, adding depth and visual complexity to your walls. This multi-layered approach transforms flat surfaces into intricate architectural features that evoke luxury and craftsmanship.
Recommended Products to replicate this idea
| # | Preview | Product | |
|---|---|---|---|
| 1 |
|
Art3d 10-Pack 47Ft White Ceiling Crown Molding Trim, High Impact Polystyrene Decorative Ceiling... | Check Latest Price |
| # | Preview | Product | |
|---|---|---|---|
| 1 |

|
YEFANXI - Flexible White PVC Wall Molding Trim Self-Adhesive, 0.47IN*0.28IN, 10FT Roll, Corner... | Check Latest Price |
Visualize a base layer of simple crown or chair rail molding, topped with narrower strips, decorative rosettes, or ornate trim—each layer carefully aligned to build a harmonious, layered composition. The combination of smooth and detailed moldings, along with contrasting colors or finishes, results in a compelling three-dimensional effect.
The layered design invites the eye to explore the wall, adding sophistication and a custom feel to any room. When lit with ambient lighting, shadows cast by the multiple layers enhance the room’s depth and texture, creating a cozy yet elegant atmosphere.
Begin by choosing various molding profiles—such as flat panels, decorative trims, or ornate crowns—and measure carefully to design your layered pattern. Attach the larger pieces first with adhesive and nails, then add the smaller or more detailed accents, ensuring everything is level.
Use caulk to hide seams and touch up with paint or stain to match your aesthetic. For an easier start, consider pre-designed multi-layered molding kits. With patience and precision, you can craft a stunning layered wall feature that brings architectural richness and personality to your space, making it uniquely yours.
16. Molding with Built-In Lighting for Ambient Glow
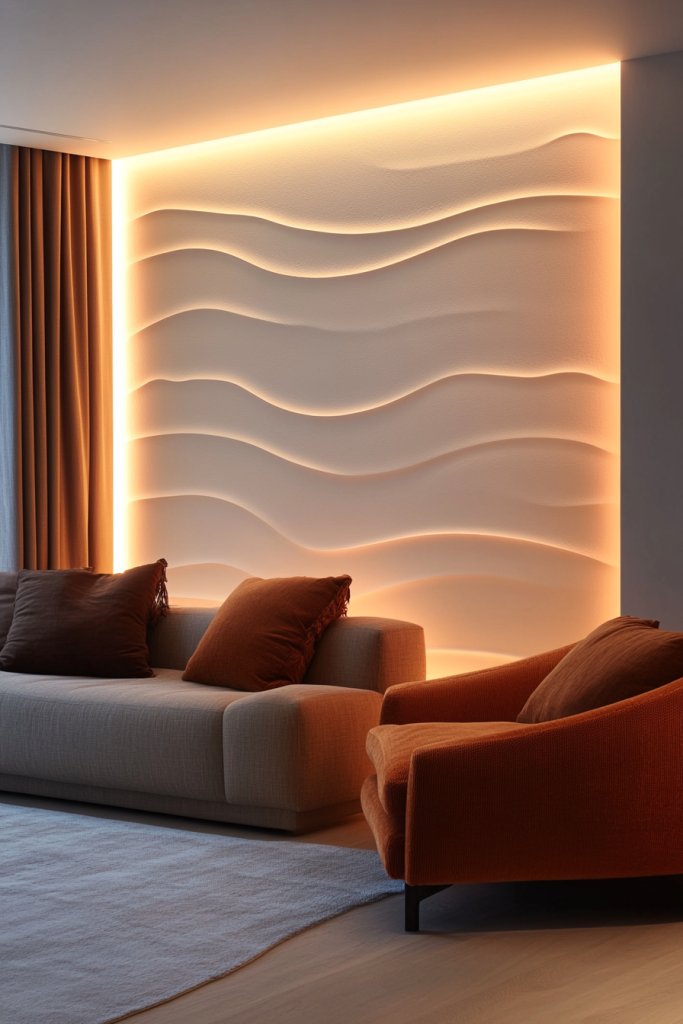
Adding built-in lighting to wall moldings transforms a room from functional to magical, creating a warm, inviting ambiance perfect for relaxing evenings or lively gatherings. This innovative feature subtly illuminates the space, highlighting architectural details while providing gentle, ambient light that enhances overall mood.
Recommended Products to replicate this idea
| # | Preview | Product | |
|---|---|---|---|
| 1 |

|
KSIPZE 100ft Led Strip Lights RGB Music Sync Color Changing Bluetooth Led Lights with Smart App... | Check Latest Price |
| # | Preview | Product | |
|---|---|---|---|
| 1 |
|
Fulton 21 Profile Contour Sanding Grips, Wood Sanding Detailer for Convex, Concave & Angles,... | Check Latest Price |
Picture a sleek, white molding running along the ceiling or around a statement wall, with hidden LED strips embedded within its profile. The soft glow emanates evenly, casting a delicate light that accentuates the intricate curves or clean lines of the molding.
The room feels cozy and sophisticated, with the lighting adding depth and a touch of modern luxury. The glow is gentle enough to serve as mood lighting, yet functional for reading or socializing without harsh overhead fixtures.
To implement, start by choosing a molding profile with a built-in channel or create space within traditional molding for LED strips. Measure your wall carefully and purchase LED strip lights with dimmable features for adjustable brightness.
Secure the strips inside the molding using adhesive or clips, then connect to a power source, ideally with a remote dimmer or smart control for convenience. For a professional look, consider hiring an electrician to ensure safe wiring, or opt for plug-in options if available. This simple upgrade can dramatically elevate your space with a modern, ambient glow.
17. Artistic Textured Molding with Decorative Details
Artistic textured moldings bring a tactile dimension to your walls, turning a simple architectural element into a statement piece filled with personality. Whether featuring intricate carvings, ornate patterns, or layered finishes, these moldings add a sense of craftsmanship and visual intrigue that elevates any room’s style.
Recommended Products to replicate this idea
| # | Preview | Product | |
|---|---|---|---|
| 1 |
|
Pangda Peel and Stick Wall Molding Kit, 3D Premade Accent Molding Wainscoting Panel for Interior... | Check Latest Price |
| # | Preview | Product | |
|---|---|---|---|
| 1 |
|
Art3dwallpanels 33 Pack 3D Wall Panel Diamond for Interior Wall Décor, PVC Flower Textured Wall... | Check Latest Price |
Imagine a richly detailed molding with carved floral motifs or geometric patterns, painted in a metallic gold or deep navy to highlight its craftsmanship. The textured surface invites touch, with raised patterns that catch the light and cast subtle shadows, creating a dynamic visual effect.
The overall look combines vintage elegance with artistic flair, transforming plain walls into stunning focal points. The tactile quality and decorative details make the space feel more curated and bespoke, perfect for those who love a mix of artistry and architecture.
For DIY-friendly options, start with foam or plywood moldings and apply textured finishes using joint compound, plaster, or textured wallpaper. For more elaborate designs, consider commissioning a professional to carve or cast custom details in plaster or resin.
Finish with paint or metallic leafing to enhance the textured surface, and seal with a clear coat for durability. To keep it simple, choose pre-made textured moldings that mimic ornate carvings, then customize with paint or metallic accents. This approach allows you to introduce artistic elegance without overwhelming your space or budget, creating a truly unique wall feature.
Conclusion
With a wide range of wall molding ideas—from timeless crown and wainscoting to bold geometric and textured designs—there’s a perfect option to elevate any space. Whether you prefer classic elegance, modern minimalism, or rustic charm, these molding styles can transform your walls into stunning focal points.
Don’t hesitate to experiment and customize these ideas to reflect your unique style and personality. Start redefining your interiors today and turn your walls into works of art!
Last update on 2025-09-21 / Affiliate links / Images from Amazon Product Advertising API
Leave a Reply