I have been, or can be if you click on a link and make a purchase, compensated via a cash payment, gift, or something else of value for writing this post. As an Amazon Associate, I earn from qualifying purchases. Please read my full Affiliate Disclosure for more information.
Ever wondered how some kitchens look effortlessly organized and inviting while others feel chaotic no matter how much you try? DIY kitchen organization projects have become incredibly popular because they offer a cost-effective and creative way to transform your space into a tidy, functional haven. Not only do these ideas help maximize storage, but they also add a personal touch that reflects your style—all while making everyday cooking and cleaning simpler and more enjoyable.
In this article, you’ll find a treasure trove of inspiring and practical DIY ideas to declutter and optimize your kitchen. From clever storage hacks to stylish makeshift solutions, we cover a wide variety of approaches to suit any space and skill level. Whether you’re looking for quick fixes or more ambitious projects, get ready to turn your kitchen into a beautifully organized space that works for you!
1. Install Floating Shelves for Easy Access to Frequently Used Items
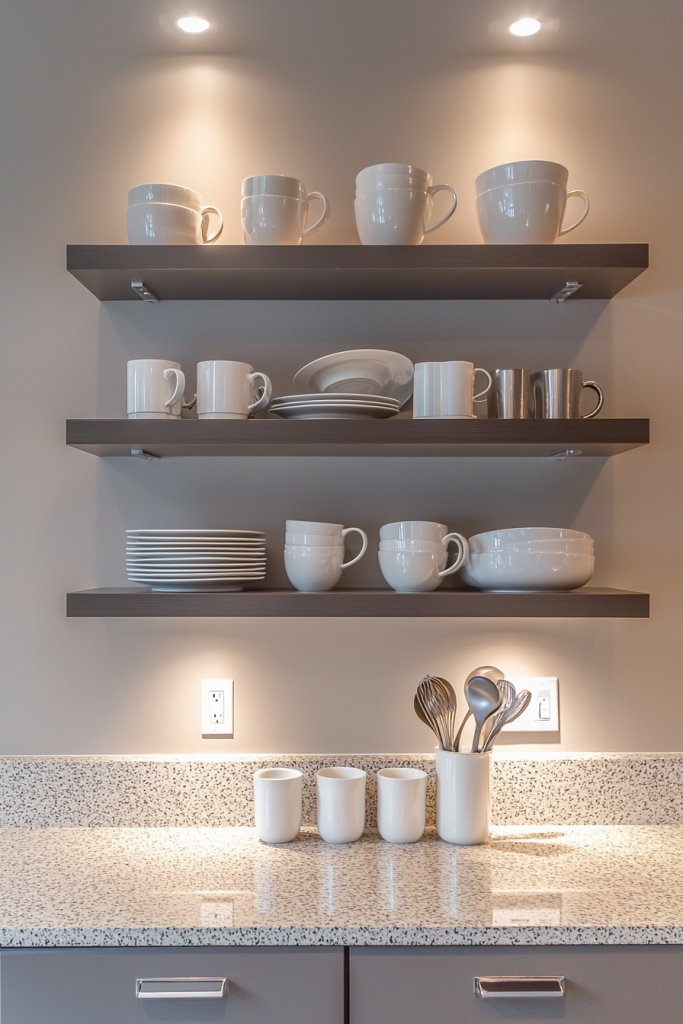
Installing floating shelves is a game-changer when it comes to keeping your most-used kitchen items within arm’s reach and your countertop clutter-free. This simple upgrade transforms your space into an organized oasis where everything you need is beautifully displayed and easily accessible.
Imagine sleek, matte-finished wooden shelves in a soft, warm oak tone mounted seamlessly against a crisp white backsplash. The shelves hold a carefully curated collection of everyday essentials: a set of ceramic canisters in muted pastel shades, a few stylish glass jars filled with cooking staples, and a couple of decorative ceramic bowls.
The contrast between the smooth, textured wood and glossy glass, combined with the gentle glow of under-shelf LED lights, creates an inviting and functional focal point. The overall look feels airy and modern, with a touch of rustic charm, while the open design invites a tactile and sensory experience as you reach for your spices or utensils.
Getting started is straightforward and budget-friendly. You’ll need sturdy floating shelf brackets, which can be metal or wood, and a few planks of wood or pre-made shelves from your local store.
First, decide where you want the shelves—above your countertop or stove for maximum convenience—and mark the spots. Use a drill to attach the brackets securely to the wall, then place the shelves on top, ensuring they are level.
If you prefer a more polished look, consider painting or staining the shelves beforehand. With just a few tools and materials, you can create a personalized display that keeps your kitchen organized and visually appealing.
2. Use Clear Acrylic Containers for Pantry Staples
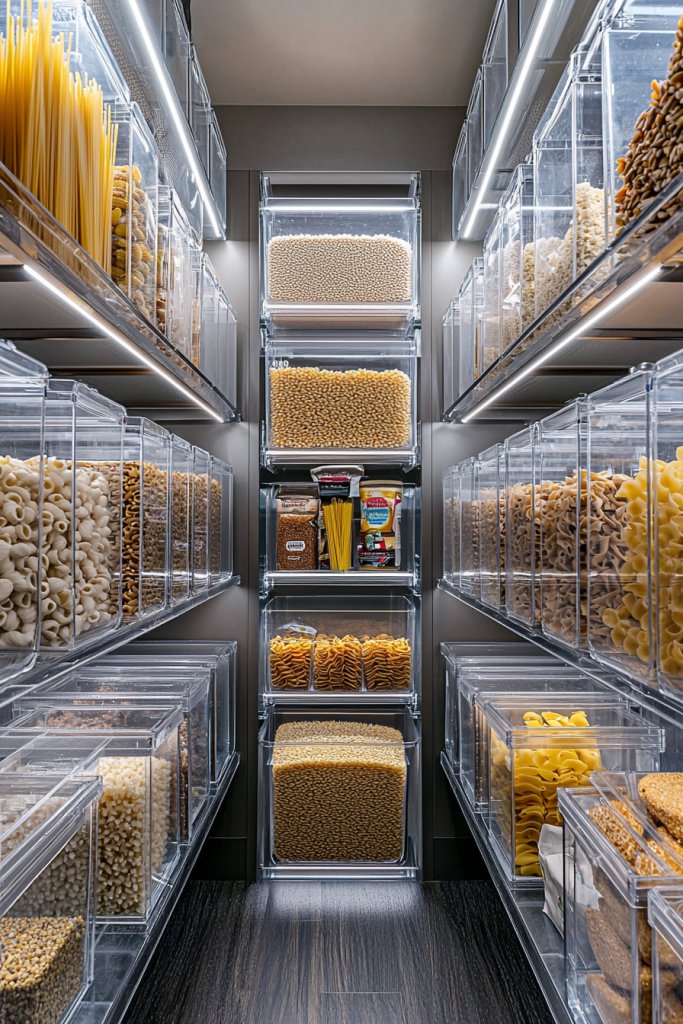
Maximize your pantry space and keep your essentials beautifully organized with clear acrylic containers. Not only do they make your pantry look sleek and modern, but they also help you quickly locate what you need without rummaging through clutter.
Imagine a row of transparent acrylic jars and bins neatly aligned on open shelves, showcasing colorful dried pasta, rice, and baking ingredients. The smooth, glossy surfaces catch the light, adding a bright, clean feel to your kitchen.
Each container has a simple white or black label, making it easy to identify contents at a glance. The textures of the containers contrast gently with the rustic wooden shelves or glossy tile backsplash, creating a harmonious balance.
The overall look is crisp, fresh, and inviting, with a scent of freshly baked bread or herbs lingering nearby. To recreate this look, start by gathering clear acrylic containers in various sizes—think of small jars for spices and larger bins for grains or snacks.
You can find these at most home goods stores or online, and they often come with airtight lids to keep everything fresh. Label each container with easy-to-read tags or chalkboard labels for quick identification.
Place them on open shelves or inside cabinets for a tidy, visually appealing display. If acrylic isn’t available, glass jars with metal or bamboo lids are a stylish alternative that still offers transparency and ease of access. With just a few simple supplies and a bit of organization, your pantry will transform into a functional, beautiful space.
3. Repurpose Wine Crates as Stylish Storage Bockets
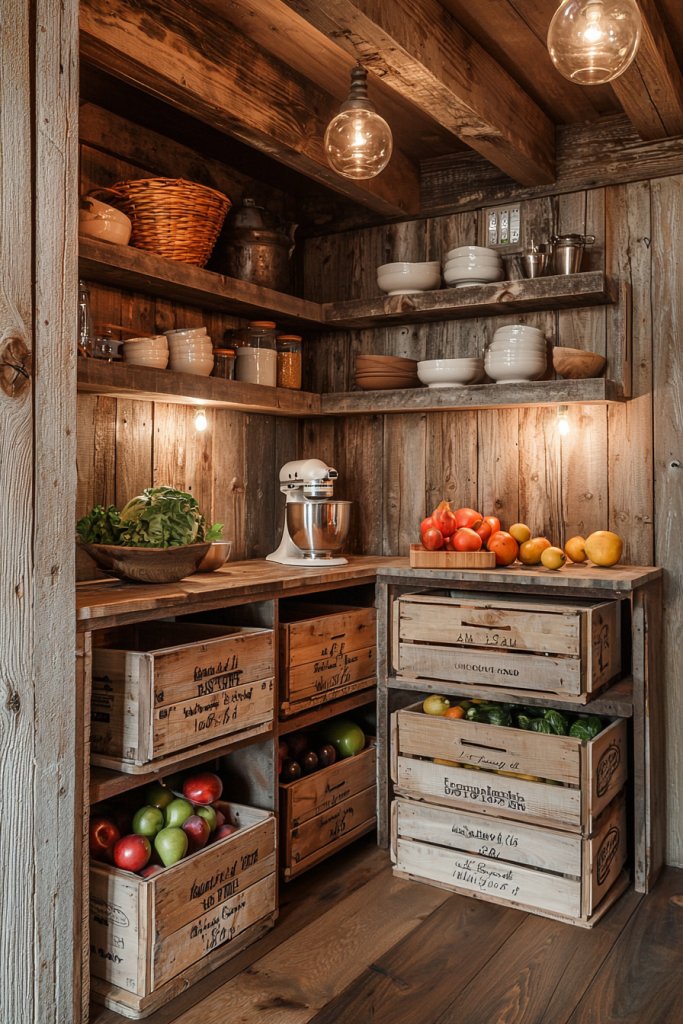
Looking for a charming way to add both storage and style to your kitchen? Repurposing wine crates is a clever DIY solution that transforms everyday crates into eye-catching storage bouches, keeping your space organized and visually appealing. Imagine a set of vintage-inspired wine crates painted in soft, neutral tones like creamy white or weathered gray, stacked neatly or arranged side by side.
The rough, textured wood provides a rustic charm, while the open slats allow glimpses of colorful dish towels, cookbooks, or decorative jars tucked inside. To elevate the look, add personalized labels or stenciled words on the crates, and maybe layer in a cozy woven throw or a ceramic vase on top for a finished, inviting feel.
The overall vibe is warm, inviting, and effortlessly stylish, bringing a touch of farmhouse elegance to your kitchen. Getting started is easier than you think! First, gather some sturdy wine crates—these can often be found at thrift stores or wine shops.
Sand down any rough edges to prevent splinters, then paint or stain them in your preferred color. Once dry, stack or position them as desired, and fill with your kitchen essentials like utensils, napkins, or small appliances.
For added stability, secure the crates with nails or brackets if stacking. With just a few simple supplies and a sprinkle of creativity, you’ll have a charming storage solution that’s both functional and decorative.
4. Create a Magnetic Spice Rack on the Side of Your Refrigerator
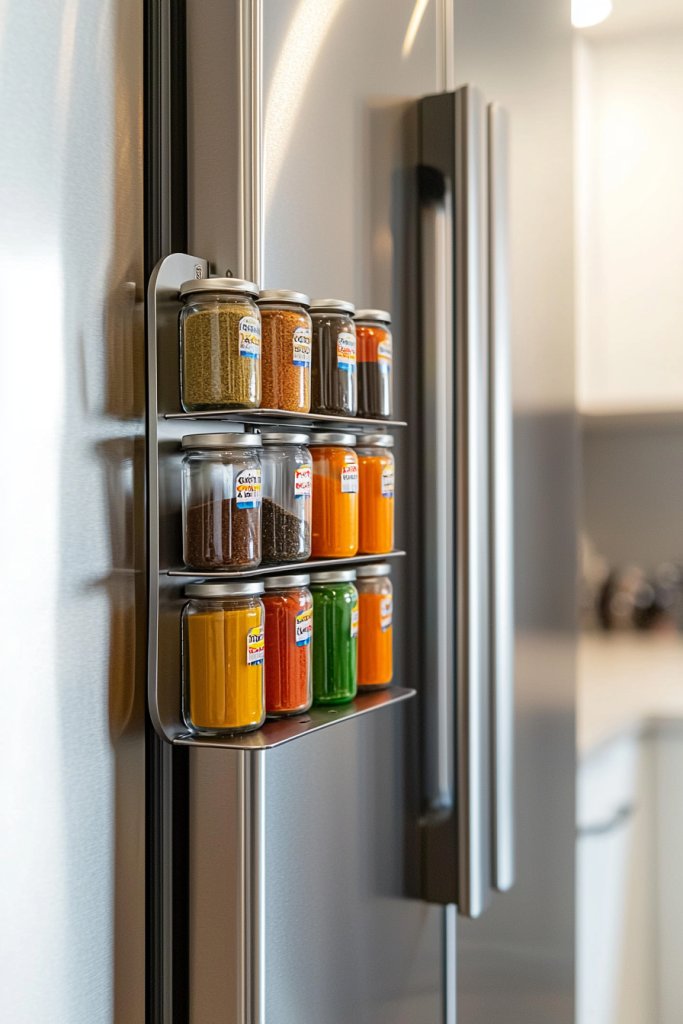
Transforming a small corner of your kitchen into a sleek, accessible spice station can dramatically streamline your cooking routine. A magnetic spice rack on the side of your refrigerator keeps your favorite seasonings within arm’s reach, reducing clutter on countertops and inside cabinets.
Imagine a slim, stainless steel strip attached vertically along the side of your fridge, with small, round magnetic containers filled with vibrant spices like paprika, turmeric, and cumin. The containers have clear lids, making it easy to identify contents at a glance, and their glossy surfaces reflect the ambient kitchen light, adding a modern touch.
The textured metal surface contrasts nicely with the smooth, matte finish of your refrigerator, creating a tidy, organized look. The colorful spice jars add bursts of warmth and personality, making your kitchen feel lively and inviting every time you cook.
You might even add small decorative accents like tiny ceramic labels or minimalist hooks for spoons to complete the aesthetic. Getting your magnetic spice rack set up is simple and budget-friendly.
You’ll need a magnetic strip—available at most hardware stores—and small, round magnetic containers or spice jars with lids. Attach the strip securely to the side of your refrigerator using strong adhesive or screws, depending on the surface, then fill the containers with your favorite spices.
For a more stylish look, consider using decorative metal containers or colorful silicone lids. Arrange the jars neatly on the strip, and you’re ready to spice up your cooking space—quickly, efficiently, and beautifully.
5. Hang Utensil Hooks Under Cabinets for Quick Reach
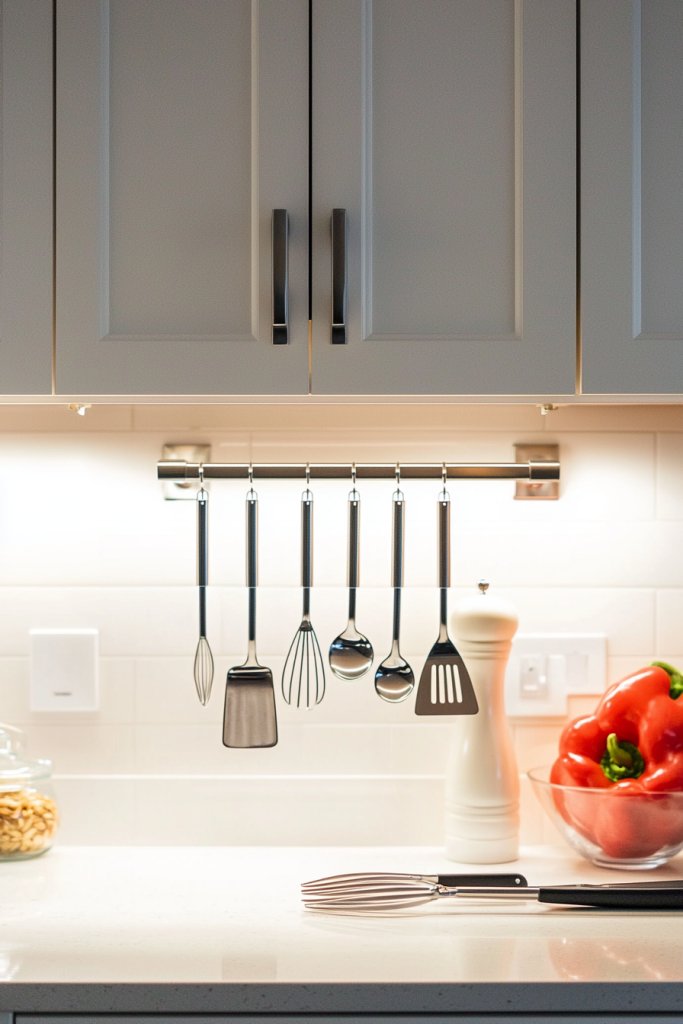
Maximize your kitchen’s efficiency by hanging utensil hooks under your cabinets—an easy upgrade that keeps your most-used tools within arm’s reach. Say goodbye to cluttered counters and hello to a tidy, streamlined space where everything has its place.
Imagine a sleek row of matte black metal hooks evenly spaced beneath a warm, honey-toned wooden cabinet. The hooks hold a variety of utensils: shiny stainless steel spatulas, colorful silicone spoons, and a set of vintage-style measuring spoons painted in soft pastel hues.
The area feels organized and inviting, with a subtle scent of fresh herbs lingering nearby, and the hooks adding a modern touch to your kitchen’s rustic charm. The smooth metal contrasts beautifully with the textured wood grain, creating a balanced and visually appealing display that makes cooking more enjoyable.
To recreate this look, start with inexpensive adhesive or screw-in hooks designed for kitchens—metal or plastic options work well. Measure and mark where you want each hook to go, ensuring they’re evenly spaced for a balanced look.
Attach the hooks directly under your cabinets using screws or strong adhesive strips, depending on the surface. For a more polished finish, choose hooks in a color or style that complements your kitchen décor, like matte black, brushed nickel, or colorful ceramic. With just a few simple tools and materials, you’ll have a functional and stylish space that invites you to cook and organize with ease.
6. Use Over-the-Door Organizers for Small Kitchen Tools
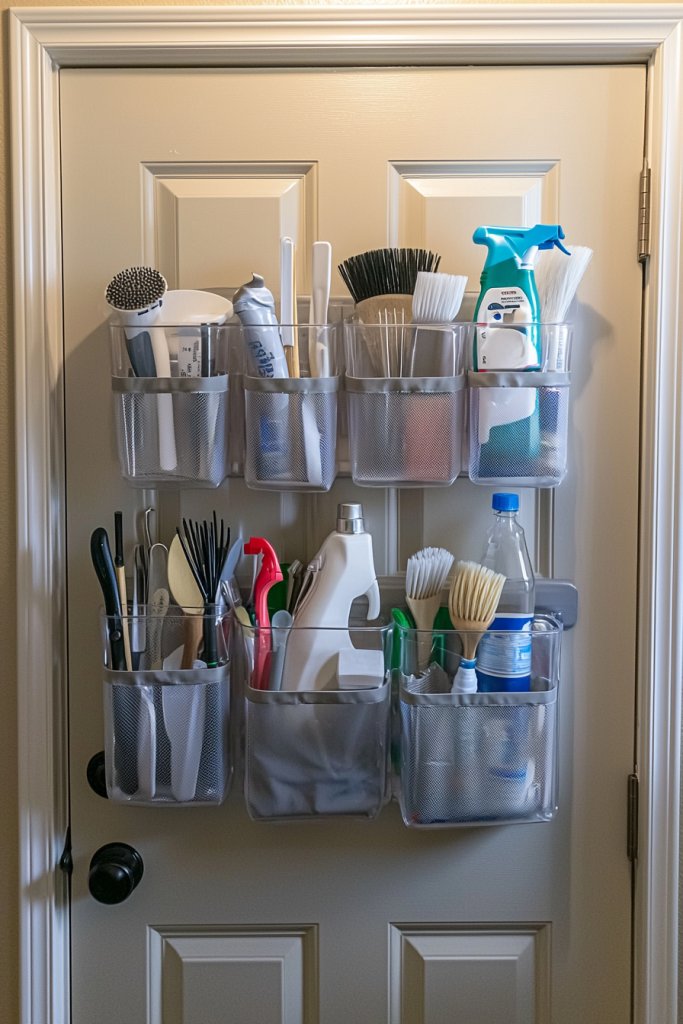
Maximize your kitchen space and keep small tools within easy reach by using over-the-door organizers. This clever solution transforms often-unused door surfaces into functional storage zones, reducing clutter on countertops and inside drawers.
It’s especially handy for items like oven mitts, measuring cups, or spice packs, making your kitchen more organized and efficient. Imagine a sleek fabric or plastic organizer hanging over your pantry or cabinet door, with multiple clear pockets or hooks.
The pockets are often transparent, allowing you to see at a glance what’s inside, and the hooks can hold utensils, dish towels, or small gadgets. The entire setup adds a tidy, streamlined look, with the soft fabric or durable plastic complementing your kitchen decor.
It’s a simple, space-saving way to keep small items accessible without sacrificing style or functionality. Getting started is straightforward: choose an over-the-door organizer with enough pockets or hooks for your needs, preferably with a sturdy, non-slip backing.
Hang it securely over your pantry or cabinet door, then organize your small kitchen tools—like silicone spatulas, bottle openers, or cleaning brushes—inside or on the hooks. You can even customize the arrangement based on your daily routine, making this a versatile and budget-friendly upgrade.
7. Refinish and Label Glass Jars for a Cohesive Look
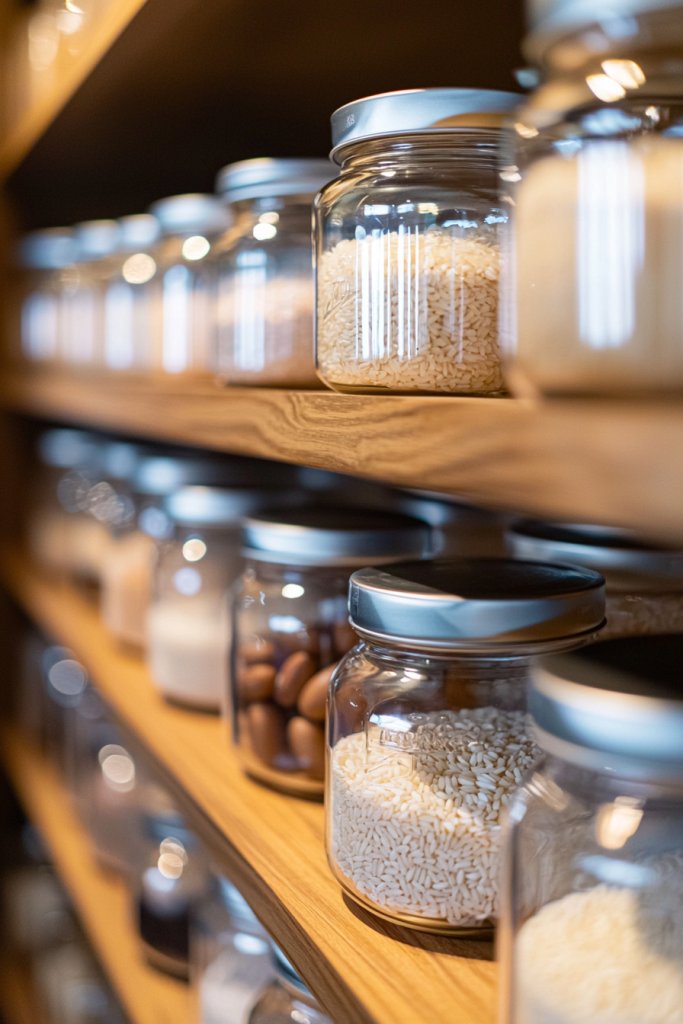
Transform your pantry by refinishing and labeling glass jars, creating a unified and stylish storage system that makes finding ingredients effortless. This project not only adds a polished aesthetic but also encourages organization and reduces food waste through clear visibility.
Plus, customized labels bring a personal touch that elevates your kitchen decor. Visualize a row of uniformly sized glass jars with smooth, matte or glossy finishes, each topped with a matching lid—perhaps in brass, wood, or painted to match your color scheme.
The contents are clearly visible through the glass, with vibrant spices, grains, or dried herbs adding pops of color. Labeling in a clean font, whether handwritten on chalkboard stickers or printed with a label maker, ensures everything is easily identifiable.
This cohesive look feels fresh, inviting, and well-organized, with a hint of rustic charm. To create this look, start by sourcing clear glass jars—think mason jars, or purchase uniform jars from a home goods store.
Refinish the lids with spray paint or stain for a uniform appearance. Next, label each jar using a chalk marker, printable labels, or handwritten tags, and affix them to the jars’ fronts. Fill the jars with your pantry staples, then arrange them neatly on open shelves or inside cabinets for a streamlined, attractive display that simplifies your cooking routine.
8. Build a Custom Rolling Cart for Extra Counter Space
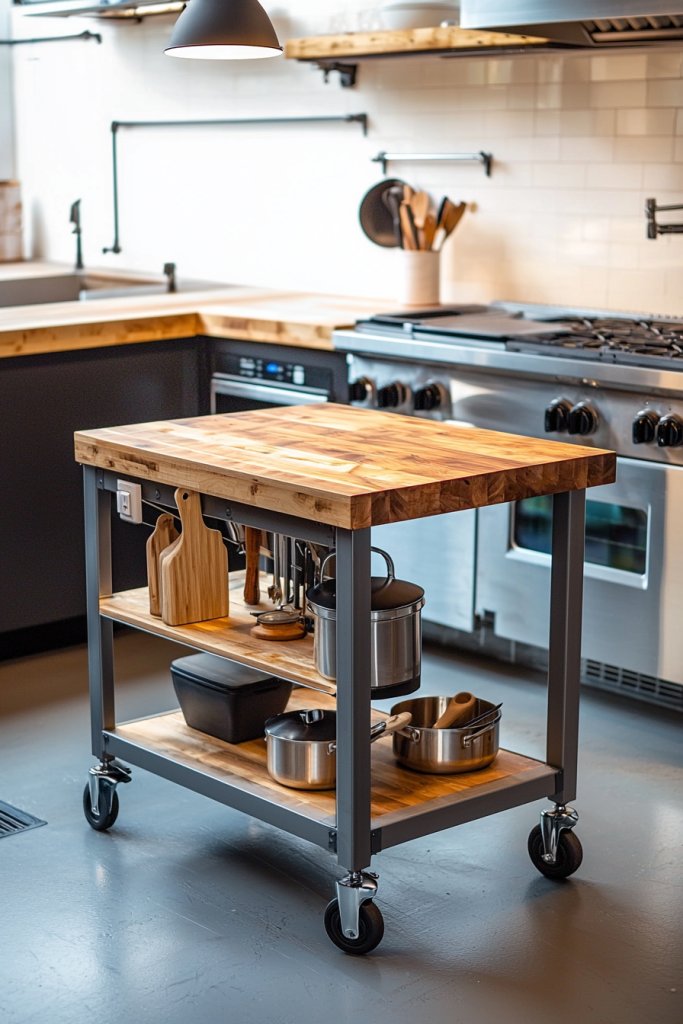
A custom rolling cart is a game-changer for small kitchens, providing additional prep space, storage, and mobility. Whether used as a mini island or a serving station, this DIY project helps you maximize your kitchen’s potential without permanent fixtures.
It’s perfect for busy households that need flexible, stylish solutions. Picture a sturdy wooden or metal cart on smooth caster wheels, with a spacious top surface in a warm wood finish or sleek laminate.
Below, shelves or baskets hold pots, pans, or cooking utensils, while the sides might feature hooks for hanging towels or utensils. The design can be customized with paint, hardware, or decorative trim to match your aesthetic—be it farmhouse, modern, or vintage.
The cart’s mobility allows you to easily shift it around for different tasks, making your kitchen more versatile. To build your own, gather a wooden or metal cart frame (pre-made or DIY-built), caster wheels, and a durable top surface—like butcher block or laminated wood.
Attach the wheels securely, then add shelves or baskets underneath. Finish with paint or stain for a polished look, and incorporate hooks or handles for added functionality. This project is approachable for beginners with basic tools and results in a practical, stylish addition to your kitchen.
9. Repurpose Mason Jars as Drawer Organizers for Cutlery
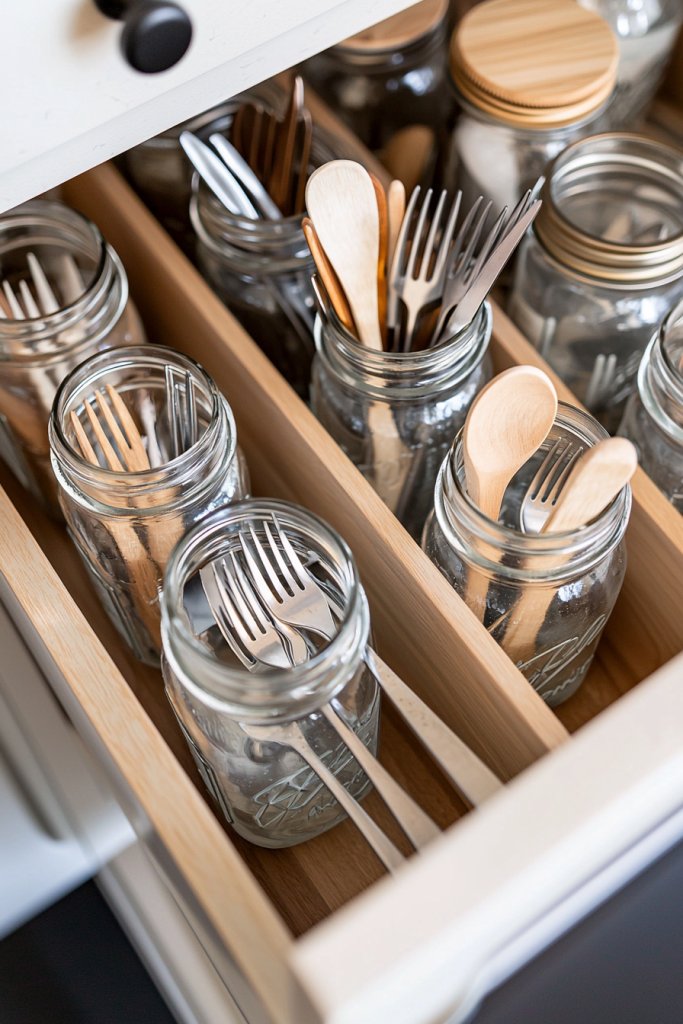
Using mason jars as drawer organizers is an inventive way to keep cutlery and small kitchen tools tidy while adding a rustic charm. This DIY idea makes it easy to separate utensils, prevent clutter, and add visual interest to your drawers, all while utilizing something you might already have at home.
Imagine a drawer filled with neatly arranged mason jars, each holding a different category—spoons, forks, knives, or measuring spoons—lined up in a row. The jars are clear, allowing you to see everything at a glance, and their wide mouths make it simple to grab what you need.
The natural texture of the glass, combined with the metal lids, creates a warm, vintage vibe that complements various kitchen styles, from farmhouse to industrial. Implementing this idea is simple: clean and dry your mason jars, then fill them with your cutlery and small tools.
Place the jars inside your drawer, arranging them side by side. To keep them stable, you can add a non-slip liner underneath or secure the jars with a custom tray made from wood or plastic. This DIY project is budget-friendly, customizable, and helps you maintain a clutter-free, charming kitchen space.
10. Install Drawer Dividers for Better Utensil Separation
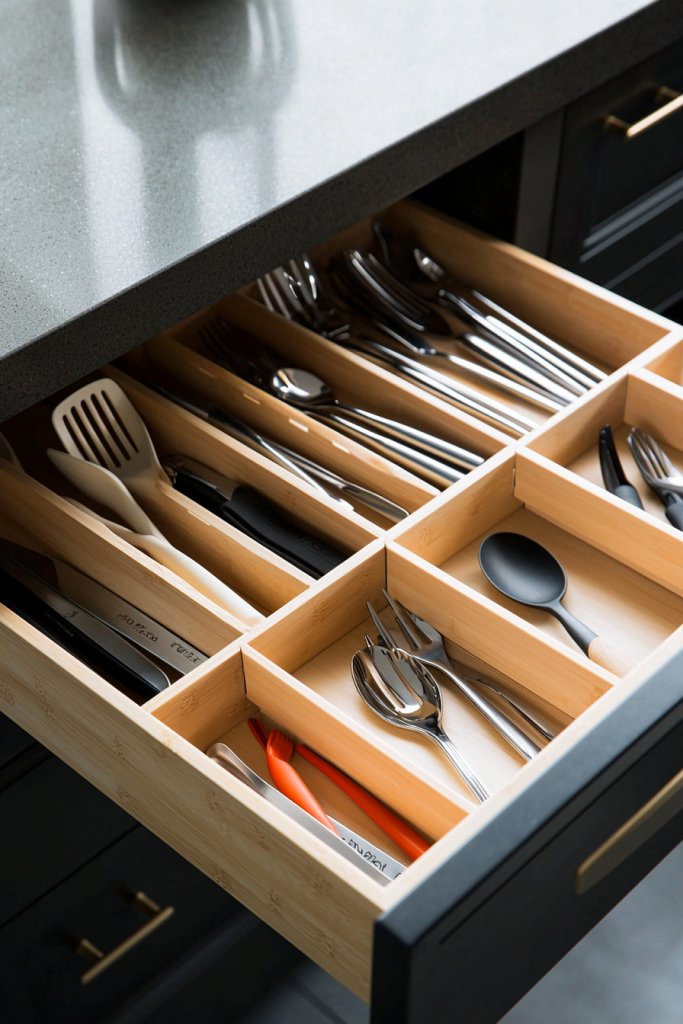
Drawer dividers are essential for transforming a cluttered utensil drawer into an organized, efficient space. They keep everything separated and easy to find, saving you time during meal prep.
This simple upgrade offers a clean, orderly look that enhances both the functionality and aesthetic of your kitchen. Envision a drawer neatly divided into sections—spoons in one, spatulas in another, and scissors or bottle openers in their own compartments.
The dividers can be adjustable or fixed, made of bamboo, plastic, or metal, fitting snugly into your drawer. These separators create clear boundaries, prevent utensils from shifting around, and make it effortless to grab the right tool quickly.
The result is a streamlined, professional-looking drawer that reduces frustration and increases efficiency. To install, measure your drawer’s internal dimensions and purchase adjustable or pre-cut dividers that suit your needs.
Insert the dividers into the drawer, arranging them to create compartments for each utensil type. For added stability, secure the dividers with adhesive strips or non-slip pads if necessary. This straightforward project requires minimal tools and instantly upgrades your kitchen’s organization, making everyday cooking simpler and more enjoyable.
11. Use Pegboards for Adjustable and Visible Storage

Transform your kitchen walls into functional art by installing a pegboard—a versatile and customizable storage solution that keeps your essentials within easy reach. Pegboards are especially popular because they combine practicality with a modern, industrial aesthetic, making your space look both organized and stylish.
Perfect for small kitchens or those needing flexible storage, they help eliminate clutter and add a personalized touch. Imagine a sleek black metal pegboard mounted on a crisp white wall, dotted with colorful hooks and small baskets.
You might see spatulas hanging neatly alongside measuring spoons, while a row of small pots and utensils hang from adjustable pegs, creating a vibrant, accessible display. The textured surface contrasts beautifully with smooth countertops, and the open design allows you to see everything at once.
The tactile experience of reaching for a tool and the visual order it creates makes the kitchen feel more spacious and inviting. Getting started is straightforward: purchase a sturdy pegboard, ideally made of metal or thick wood, depending on your style preference.
Use wall anchors and screws to secure it at your desired height. Arrange hooks, baskets, and shelves in a way that fits your routine—placing frequently used tools at eye level.
You can customize further by painting the pegboard in a color that complements your kitchen palette or adding decorative elements like themed decals. This DIY upgrade is budget-friendly and highly adaptable, perfect for creating a clutter-free cooking space.
12. Construct a Fold-Down Table for Compact Dining or Prep Area
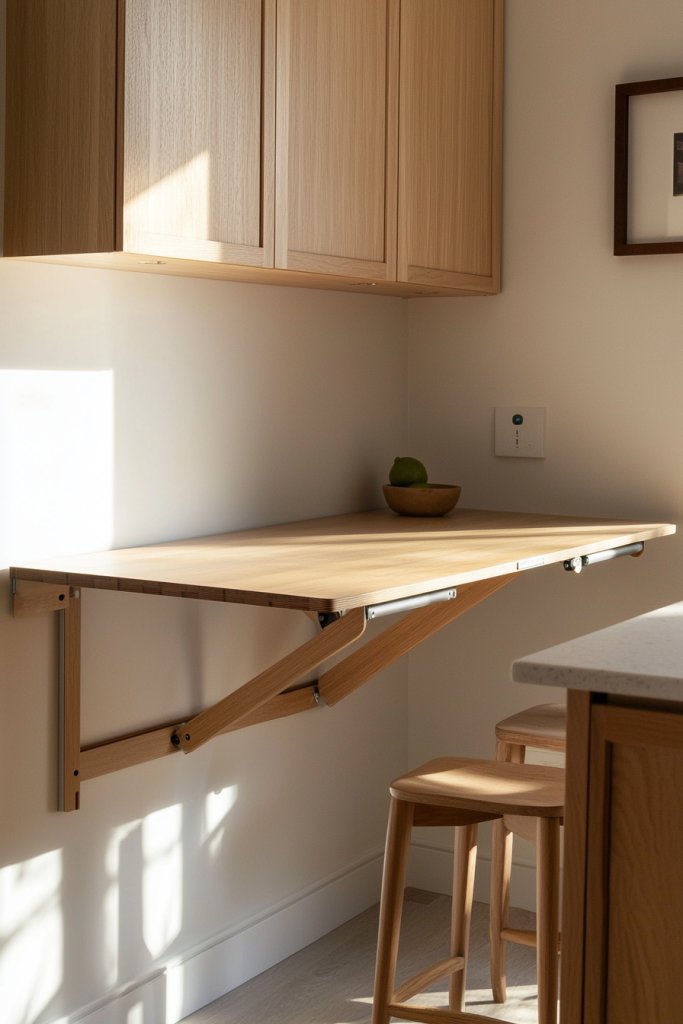
Maximize your kitchen’s functionality with a stylish, space-saving fold-down table that doubles as a dining spot or prep surface. This clever DIY project allows you to enjoy a full tabletop only when needed, then neatly tuck it away when not in use—ideal for small apartments or kitchens with limited space.
It combines practicality with a clean, minimalist look, making your kitchen feel open and organized. Visualize a sleek wooden panel mounted on the wall with sturdy hinges, painted in a soft, neutral hue like warm beige or cool gray.
When folded down, it reveals a compact table surface, measuring roughly 3 feet wide, with space for two to four people. The edges are smooth, with a polished finish that invites you to set down a plate or chop vegetables.
When lifted, the table folds flush against the wall, revealing hidden storage compartments or hooks underneath for utensils and towels. The overall effect is a seamless blend of form and function that adapts to your needs.
To build this, start with a durable wooden or MDF panel cut to your preferred size. Attach heavy-duty hinges to the wall, ensuring they are anchored into studs for strength.
Add a support leg or fold-out brackets for stability when in use—these can be made from metal or wood. Finish with paint or sealant to match your decor.
For a simpler version, you can purchase a ready-made fold-down table kit and install it following the included instructions. This DIY project is budget-friendly, easy to customize, and perfect for creating a multi-functional kitchen space.
13. Attach Command Hooks to Store Oven Mitts and Towels
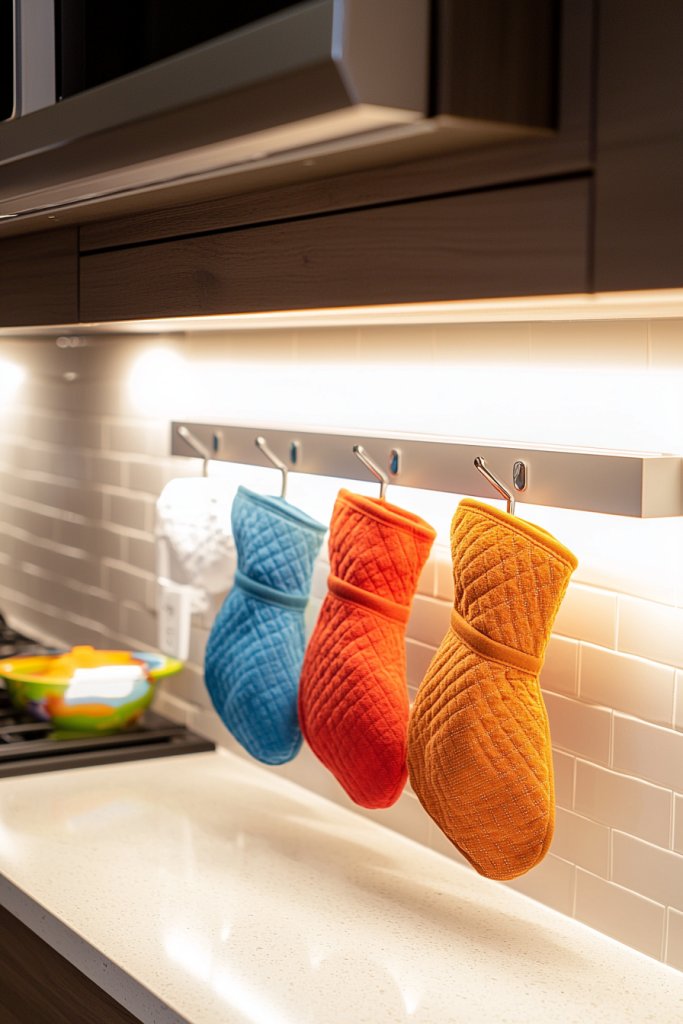
Keep your essential kitchen textiles tidy and accessible by attaching sturdy Command hooks underneath cabinets or on the side of your refrigerator. This simple, budget-friendly hack declutters countertops and drawers, making your oven mitts and dish towels easy to grab when you need them—saving time and reducing mess.
Picture a row of sleek white or metallic Command hooks mounted just below a cabinet over your stove or near your sink. Hanging from each hook are colorful oven mitts—perhaps one in cheerful red, another in a cheerful yellow—and neatly folded dish towels in coordinating shades.
The hooks provide just enough space for each item to hang freely, allowing air circulation and avoiding creases. This setup adds a touch of organized charm, and the hooks are removable, so you can reposition or change your decor without damaging surfaces.
Installation couldn’t be easier: clean the surface thoroughly, then peel and stick the Command hooks following the package instructions. Choose hooks rated for the weight of your oven mitts or towels—most can hold several pounds—making sure they’re securely attached.
For added durability, wait an hour after application before hanging items. This quick upgrade keeps your essentials within arm’s reach while maintaining a sleek, clutter-free look. Plus, it’s easily removable and reusable, making it perfect for renters or those who like to change their decor frequently.
14. Create a Hidden Trash and Recycling Bin Cabinet
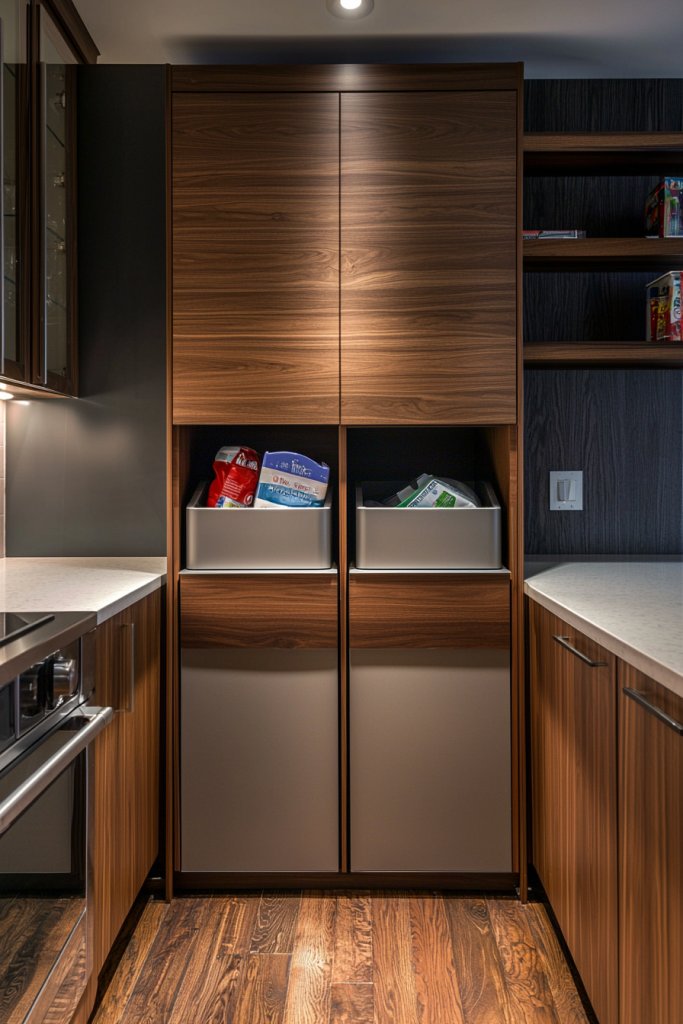
Say goodbye to unsightly trash cans by building a discreet cabinet that hides your waste and recycling bins, maintaining a clean, streamlined kitchen aesthetic. This DIY project transforms an underutilized corner or space behind a cabinet door into a functional, tidy solution—perfect for keeping odors contained and your kitchen looking polished.
Envision a small, custom-built cabinet with louvered or slatted doors, painted in a neutral tone like soft gray or crisp white to blend seamlessly with your cabinetry. Inside, you’ll find two compartments—one for trash, another for recyclables—each fitted with removable bins for easy emptying.
The exterior doors open smoothly, revealing a clutter-free space that looks as if the bins are part of the cabinetry itself. The design allows ample ventilation to prevent odors, and the compact footprint fits into tight spaces, maximizing your kitchen’s utility.
To create this, start with a wooden box or pre-made cabinet that fits your space, then cut or purchase slatted doors for ventilation. Install hinges and attach the doors securely.
Add handles or magnetic closures for a sleek finish. For the bins, opt for slim, stackable trash cans or recycling containers with removable liners.
Seal the exterior with paint or stain matching your kitchen decor. This project is manageable with basic tools and offers a sleek, hidden storage solution that keeps your kitchen tidy and odor-free.
15. Use Stackable Bins to Maximize Vertical Pantry Storage
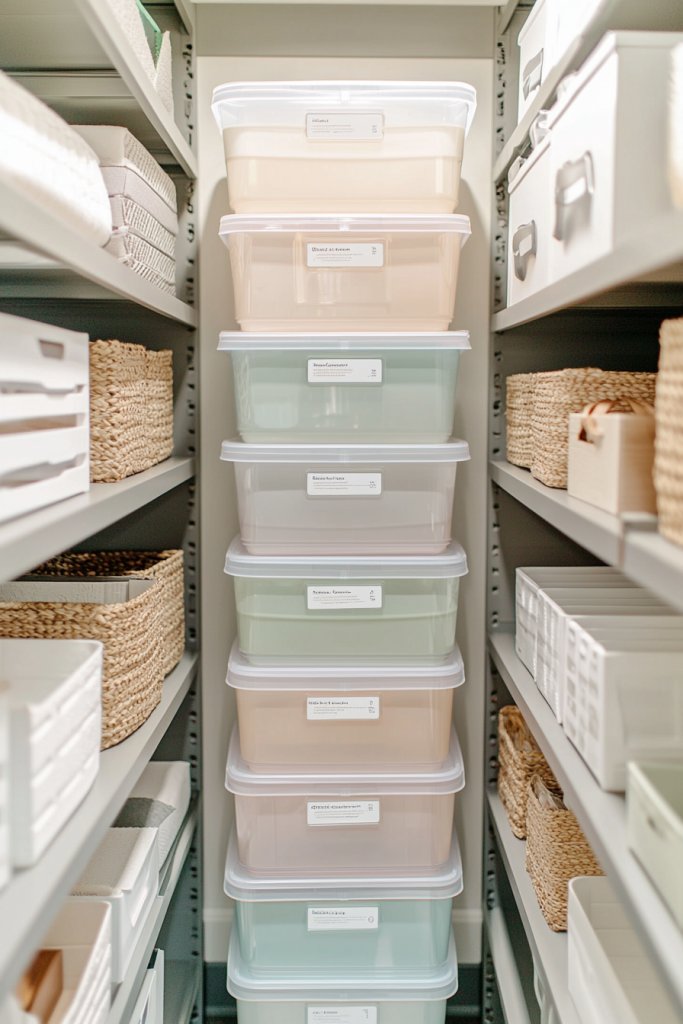
Optimize your pantry space by incorporating stackable bins, allowing you to store more items vertically and keep everything visible and accessible. This DIY upgrade is especially helpful for small kitchens or cluttered pantries, turning chaos into order with a simple, budget-friendly solution.
Picture a series of clear, stackable plastic bins arranged neatly on your pantry shelves. Each bin is labeled with bold, readable tags like “Pasta,” “Snacks,” or “Breakfast Cereal,” making it easy to locate what you need at a glance.
The transparent material lets you see contents without rummaging through stacks, while the uniform size creates a clean, organized look. You might also add small scoops or tongs stored on top of the bins for easy serving.
The vertical stacking frees up shelf space for other essentials and keeps your pantry tidy. Getting started is easy: purchase stackable storage bins in sizes that fit your pantry shelves, preferably clear for visibility.
Label each bin with a permanent marker or printable labels for quick identification. Arrange the bins in an organized manner, stacking heavier or less-used items on top, and placing frequently accessed items at eye level.
For added stability, secure the bins with non-slip shelf liners or stacking clips if needed. This simple upgrade makes better use of vertical space, reduces clutter, and helps maintain a tidy, functional pantry in any kitchen.
16. Cover Open Shelves with Decorative Baskets for a Clean Look
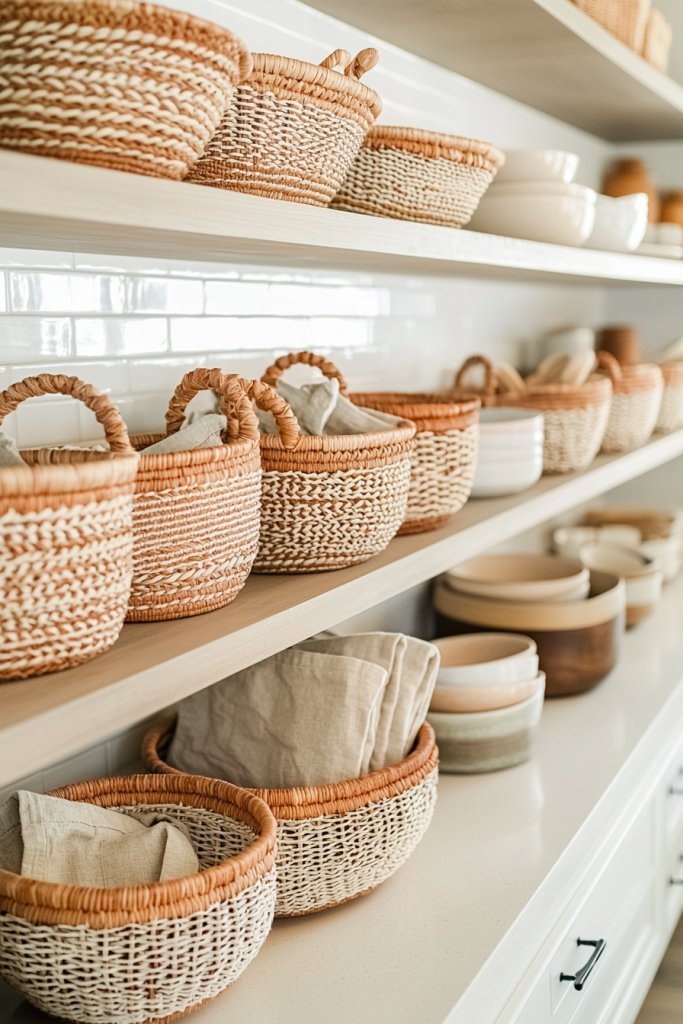
Transforming open shelves into a streamlined, stylish focal point is easier than you might think. By hiding clutter behind beautiful baskets, you can achieve a tidy, cohesive appearance that elevates your kitchen’s aesthetic.
This approach not only keeps your space feeling organized but also adds warmth and texture to your decor. Picture a set of rustic woven baskets in soft neutral tones like beige, taupe, or light gray, resting neatly on open wooden shelves.
The baskets vary in size, with some holding smaller items like spice jars or tea towels, while larger ones conceal bulkier supplies or less-frequently used tools. The textured weave contrasts beautifully with smooth, painted shelves, creating visual interest.
The overall effect is a calm, uncluttered look that feels both cozy and sophisticated, with a gentle sensory experience of natural fibers and subtle earth tones. This method provides a harmonious balance between practicality and aesthetic appeal.
To recreate this look, start by selecting decorative baskets made from materials like wicker, rattan, or fabric-lined options for a softer touch. Measure your open shelves to choose baskets that fit comfortably without overhanging.
Clear out the clutter and assign each basket a designated category—like baking supplies or cleaning items. Simply place the baskets on your shelves, stacking or lining them up for uniformity.
If desired, add labels or tags for easy identification. This simple swap instantly transforms your open shelving into a sleek, organized display.
17. Build a Custom Under-Sink Organizer for Cleaning Supplies
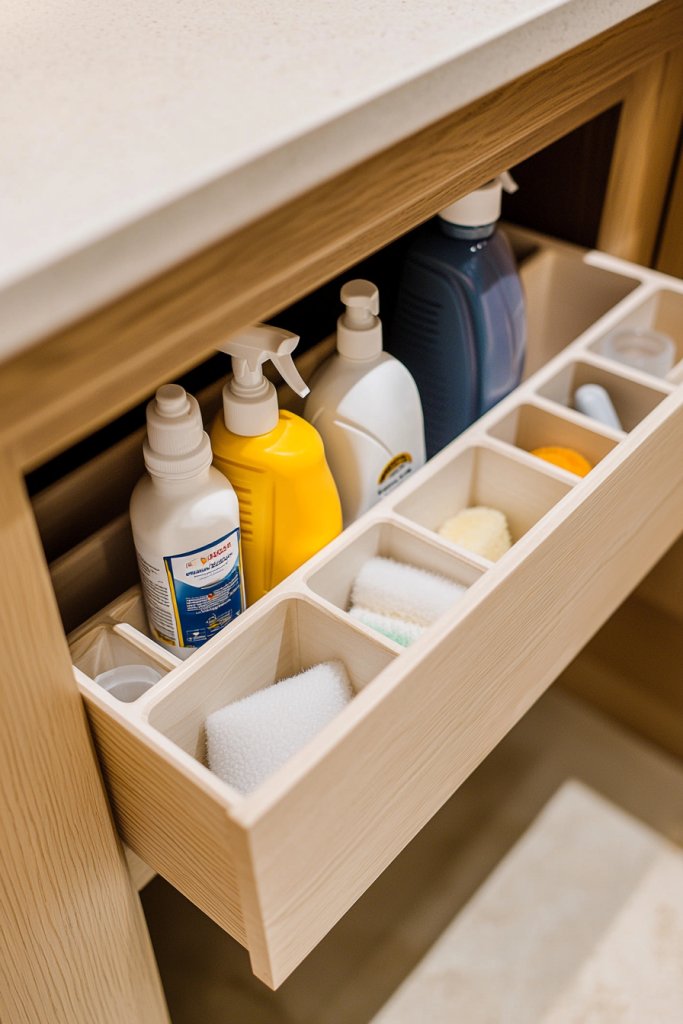
Creating a tailored storage solution under your sink can dramatically improve accessibility and reduce clutter. A well-designed organizer keeps cleaning products, sponges, and brushes neatly contained, making it easier to find what you need while maintaining a tidy appearance.
Imagine a sturdy, DIY wooden or plastic tray system that fits snugly beneath your sink. The organizer features adjustable compartments or small baskets to hold spray bottles, scrub brushes, and dish soap.
Smooth, waterproof materials like plastic or sealed wood ensure durability and easy cleaning. The space feels organized and efficient, with everything in its place, and the clutter hidden away from view.
The result is a clean, streamlined look that also reduces the stress of rummaging through messy cabinets. To build one, gather materials such as plastic storage bins, wooden slats, or a repurposed cardboard drawer system.
Measure your under-sink space carefully, accounting for plumbing fixtures. Assemble your compartments using basic tools—drill, screws, or strong adhesive—making sure each section is stable.
Place your cleaning supplies in the designated compartments, and consider adding labels or small hooks for hanging brushes. Seal or paint your organizer if desired to match your kitchen decor. With a little DIY effort, you’ll have a custom, clutter-free under-sink area that makes cleaning supplies easily accessible and neatly contained.
18. Use Lazy Susans for Corner Cabinets to Improve Accessibility
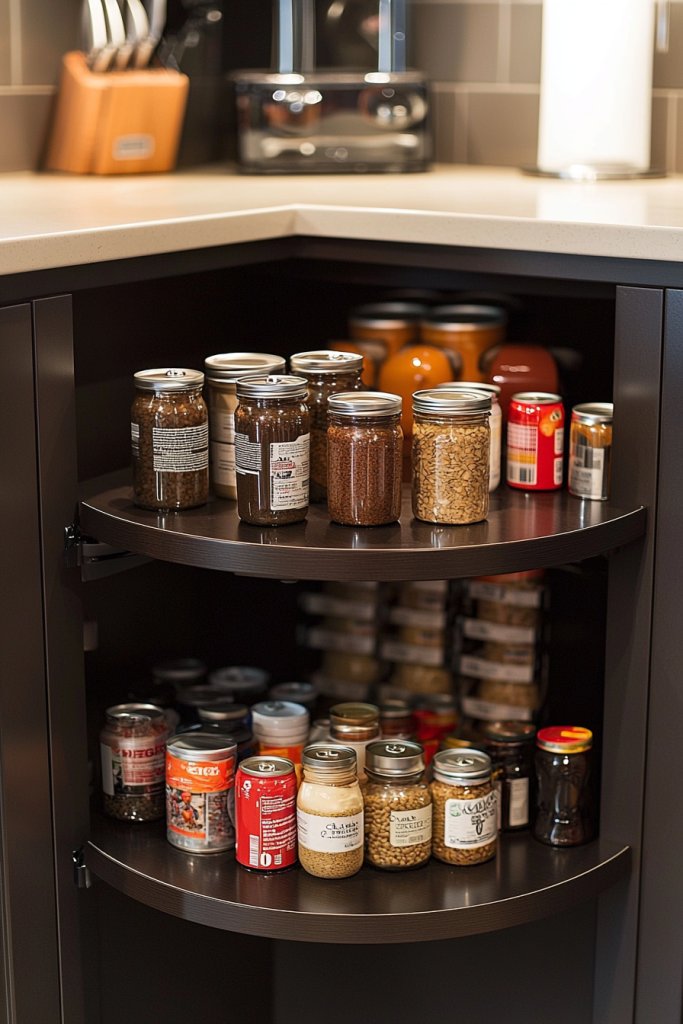
Corner cabinets often become difficult to access, leading to wasted space and frustration. Installing a Lazy Susan solves this problem by turning awkward, hard-to-reach areas into functional storage zones that are easy to organize and use.
Visualize a round, rotating shelf system inside your corner cabinet—made of wood, plastic, or metal—spinning smoothly to reveal all stored items with a gentle turn. It’s filled with neatly arranged jars, cans, or small appliances, all within arm’s reach.
The Lazy Susan maximizes vertical and horizontal space, allowing you to store more without clutter. Its sleek, circular design adds a modern touch, and the smooth rotation makes grabbing items effortless.
This solution makes your kitchen more efficient and visually appealing, removing the frustration of digging through the back of cabinets. To implement, measure your cabinet’s interior dimensions to select a Lazy Susan that fits comfortably.
Purchase a sturdy, easy-turn model that can support the weight of your stored items. Clear out the cabinet, then install the Lazy Susan on the base or shelf, following the manufacturer’s instructions.
Organize your items into small containers or baskets to keep them tidy and easy to see. Place the Lazy Susan in the corner and give it a spin to test its movement. This upgrade turns a tricky corner into a highly functional, accessible storage space with minimal effort.
19. Incorporate Drawer-Style Spice Racks for Compact Storage
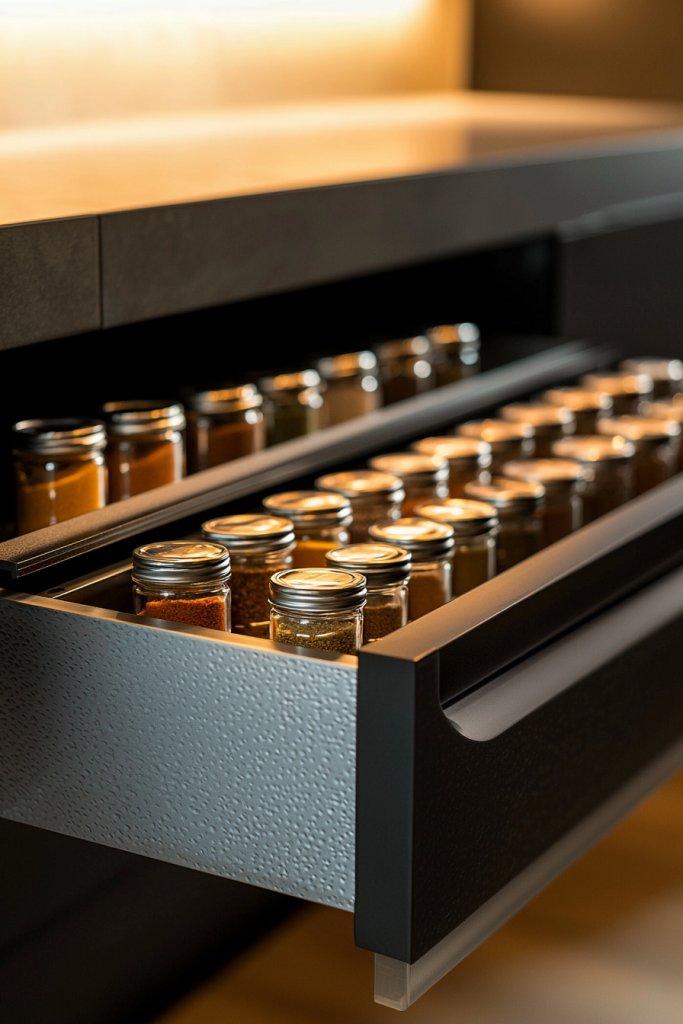
Maximize your kitchen’s space and keep your spices organized with a sleek, drawer-style spice rack. This innovative idea makes it simple to find and access your seasonings while maintaining a tidy countertop or cabinet.
Picture a slim, pull-out drawer fitted with adjustable dividers or labeled compartments, holding spice jars in a single, tidy row. The drawer can be installed inside a cabinet or as part of a custom countertop extension, with the jars facing upward for easy viewing.
The design allows for quick identification of spices, reducing clutter and cluttered counters. The clean lines and uniform jars lend a modern, minimalist vibe, making your spice collection both functional and stylish.
To create your own, gather a shallow drawer, adjustable dividers, and uniform glass or plastic spice jars with labels. Measure your available space to ensure the drawer fits seamlessly into your cabinetry.
Install the drawer on sturdy slides, and organize your spices by size and frequency of use. Label each jar clearly, and arrange them in the drawer for quick access. This simple addition saves space, makes cooking more efficient, and keeps your spice collection looking beautiful and organized—no more digging through cluttered cabinets!
20. Attach a Chalkboard or Label Holder for Meal Planning and Inventory
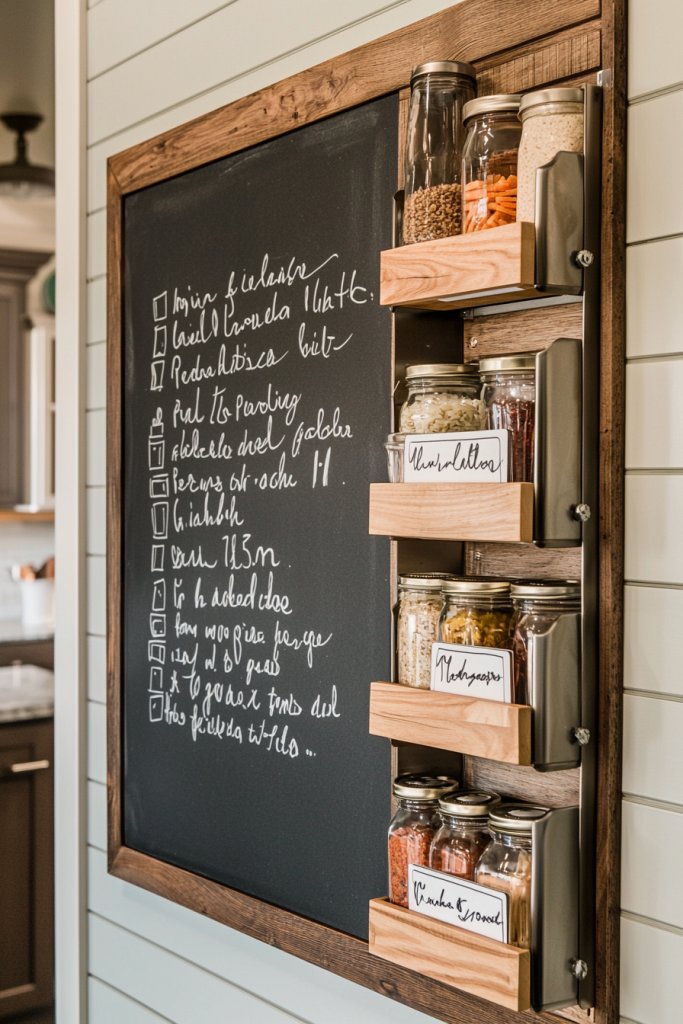
Adding a chalkboard or label holder to your kitchen makes meal planning, grocery tracking, and inventory management both fun and functional. It creates a dedicated space to jot down reminders, shopping lists, or menu ideas, helping your kitchen stay organized and visually appealing.
Imagine a small chalkboard mounted on a wall or cabinet door, framed with rustic wood or sleek metal for a modern touch. Nearby, a set of labeled jars or baskets holds staples like pasta, rice, or baking ingredients, each with a clear, stylish label or small chalkboard tag for quick updates.
The visual contrast of black chalkboard against bright jars or neutral walls creates an inviting, organized ambiance. This setup encourages family involvement and keeps your kitchen looking tidy with a personal touch.
To implement, purchase a chalkboard, chalk, and simple mounting hardware—or repurpose an old picture frame. Install it at a convenient height on your wall or cabinet door.
Use chalk or chalk markers to write meal plans, shopping lists, or notes. For labels, attach small chalkboard tags with string or adhesive to your jars, or use clear, printable labels for a sleek look.
Keep a piece of chalk nearby for quick updates. This simple addition makes your kitchen more practical, helping you stay on top of meals and supplies while adding a charming, customizable element to your space.
21. Convert a Vintage Suitcase into a Stylish Storage Ottoman
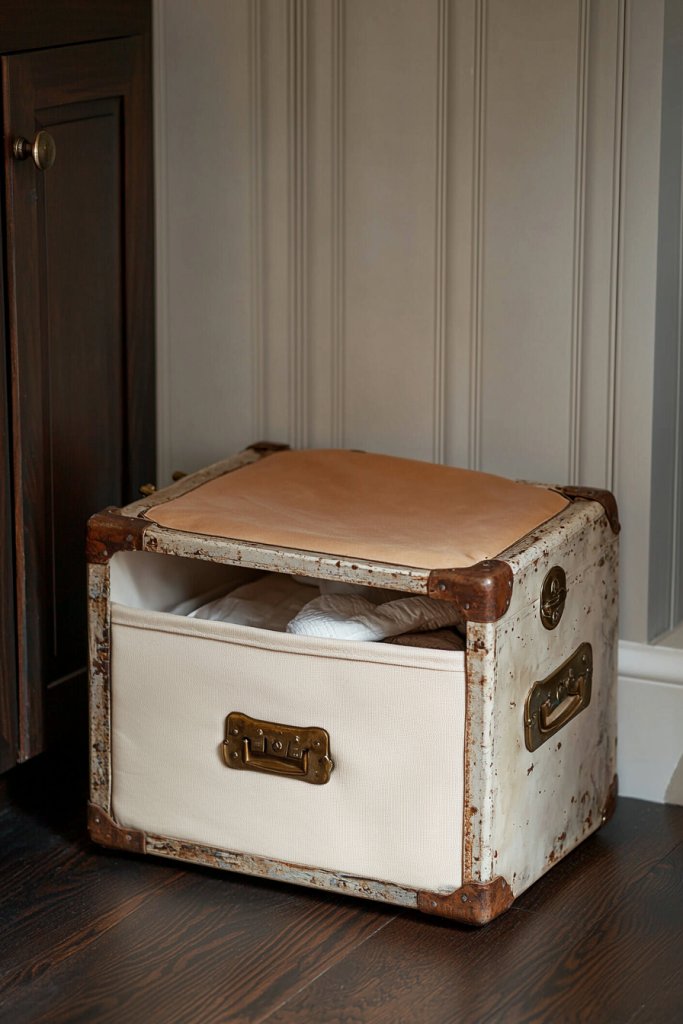
Transforming an old vintage suitcase into a chic storage ottoman is a great way to add both function and character to your kitchen. This idea blends nostalgia with practicality, turning a forgotten piece into a statement item.
It’s perfect for those who love a mix of vintage charm and modern organization, making your space feel inviting and unique. Imagine a weathered, leather-bound suitcase with brass clasps, sitting at the end of your kitchen island or under a window.
The exterior might feature rich, deep hues like caramel, burgundy, or navy, with textured stitching or embossed details. When opened, it reveals a soft fabric lining—perhaps a neutral linen or patterned cotton—holding extra dish towels, small appliances, or baking supplies.
The whole piece exudes warmth, adding a cozy, lived-in feel to your space. Its large, flat top creates a perfect seating spot or a place to set a tray of snacks, while the hidden storage keeps clutter out of sight yet easily accessible.
Getting started is straightforward. Find a suitable vintage suitcase—check thrift stores or online marketplaces—and give it a thorough cleaning.
Reinforce the interior with a piece of foam or a thick cushion for comfort if used for seating. Cover the top with a sturdy fabric or a decorative throw for added style and comfort.
Secure the fabric with a staple gun underneath, ensuring it stays taut. Finally, fill the interior with your chosen storage items, keeping everything organized and within reach, all while adding a dash of vintage flair to your kitchen.
22. Use Magnetic Knife Strips for Safer, Space-Saving Knife Storage
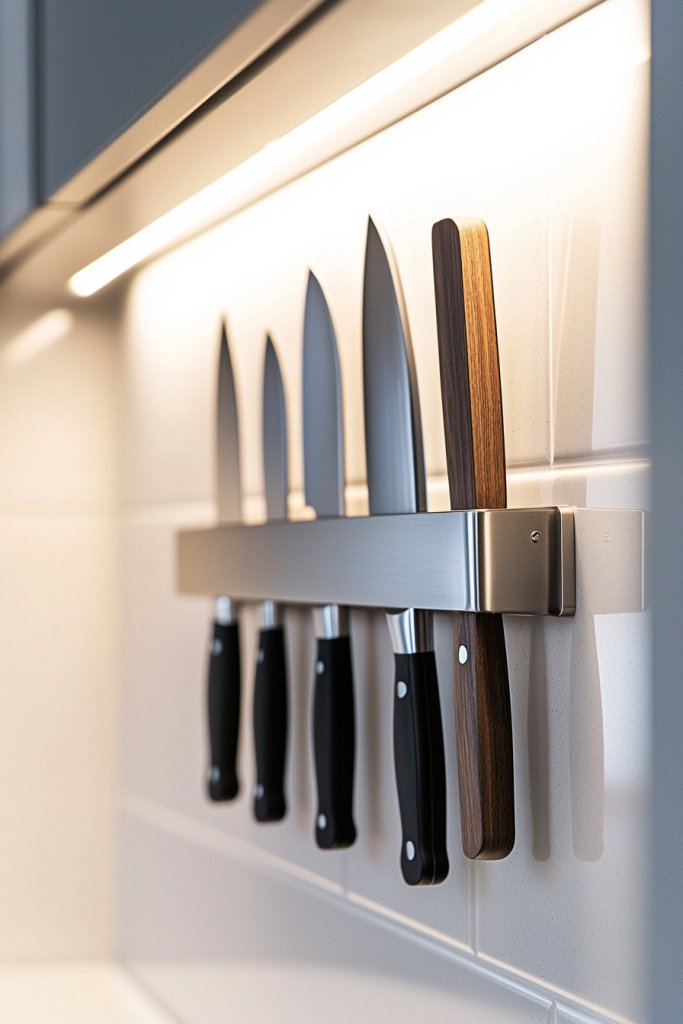
A magnetic knife strip is an innovative solution that keeps your knives within easy reach while freeing up valuable counter space. It’s a sleek, modern way to store knives safely, reducing clutter and minimizing the risk of accidents.
Plus, it adds a stylish, professional touch to your kitchen decor. Picture a slim, stainless steel or black metal strip mounted on the wall just above your countertop or stove.
Sharp knives with their blades pressed against the magnet hang securely, with their handles easily accessible. The contrast of shiny knives against the dark or metallic strip creates a striking visual.
This setup not only makes your knives look organized but also allows them to dry naturally, preventing rust or corrosion. The minimalist design complements contemporary kitchens with clean lines and neutral tones, while also fitting seamlessly into rustic or vintage spaces with a bit of rustic metalwork.
To implement, measure and mark the desired height for your strip—typically at eye level for convenience. Attach the strip securely using screws or strong adhesive, depending on your wall type.
Choose a magnetic strip made from stainless steel or powder-coated metal for durability. Ensure your knives have sturdy, full tang blades for safety—if not, opt for knife guards.
Hang your knives with the handles facing down or to the side, keeping them safe and ready to use. This simple upgrade enhances both safety and style in your kitchen.
23. Add Pull-Out Shelves to Deep Cabinets for Better Visibility
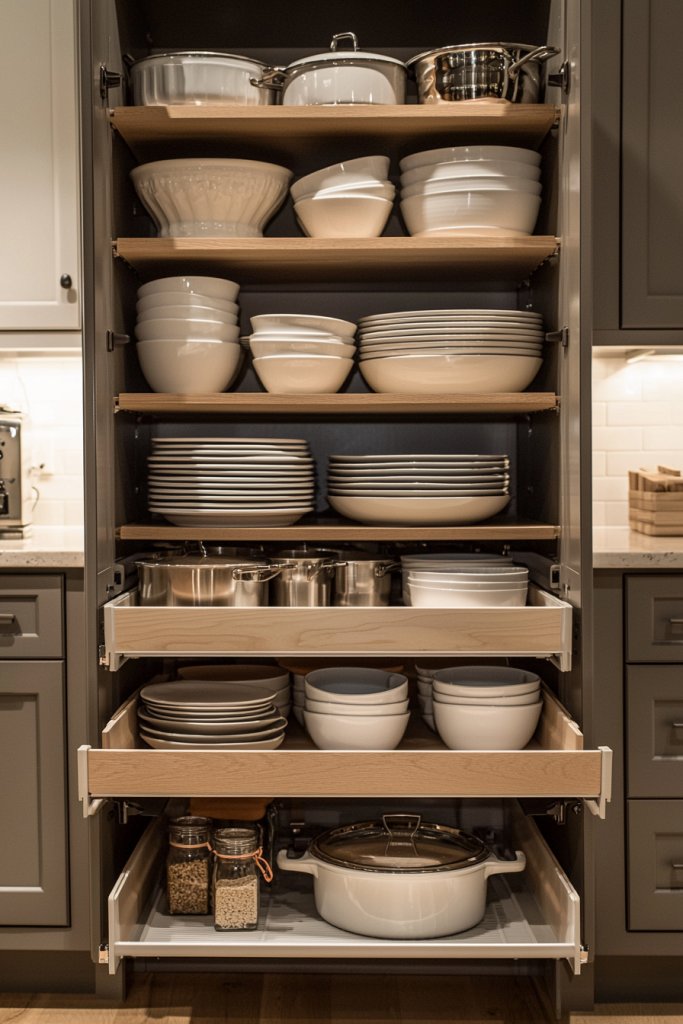
Deep kitchen cabinets often hide essentials out of sight, making it hard to find what you need quickly. Installing pull-out shelves transforms these deep spaces into easily accessible storage areas, saving time and reducing frustration during meal prep.
It’s an efficient way to maximize your cabinet’s potential. Visualize opening a cabinet door to reveal a smooth-gliding shelf that extends outward, exposing all your pots, baking pans, or pantry items at once.
These shelves are typically made of wood or metal and are mounted on sturdy rails, allowing them to slide in and out effortlessly. The shelves can be customized to fit specific dimensions, and clear or wire designs help you see contents at a glance.
When closed, they neatly tuck away, maintaining your kitchen’s tidy appearance. The overall look is practical and streamlined, adding a touch of modern functionality to traditional cabinetry.
To add pull-out shelves, start by measuring the interior depth and width of your cabinets. Purchase compatible slide hardware and shelves—many options are available at hardware stores or online.
Remove the existing shelf and install the slides according to manufacturer instructions, usually securing them to the sides of the cabinet. Place the new shelf on the slides and test for smooth operation.
Fill the shelves with your kitchen essentials, and enjoy quick access to everything without the need to dig through deep, dark corners. It’s a simple upgrade with a big impact on your kitchen’s organization.
24. Create a DIY Pot Lid Organizer on the Inside of Cabinet Doors
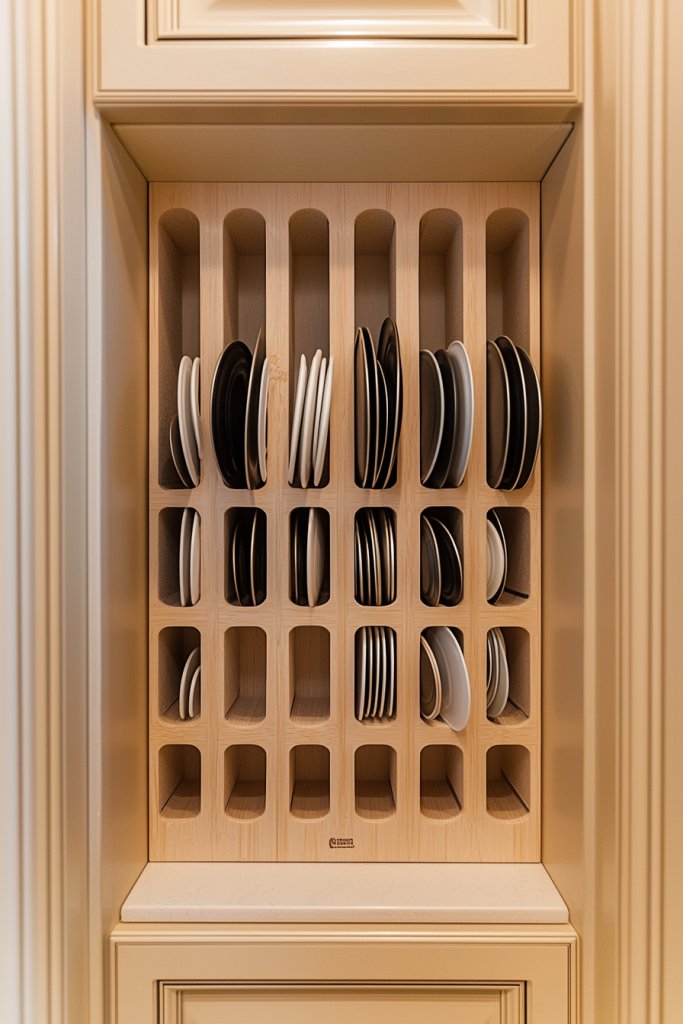
Keeping pot lids organized and within easy reach can be a challenge, but installing a DIY lid organizer on the inside of your cabinet door provides a neat, space-efficient solution. This project helps prevent clutter on countertops and keeps your lids tidy and accessible.
Visualize a series of small, evenly spaced dividers or pockets mounted vertically along the inside of your cabinet door. These can be made from repurposed magazine holders, wooden slats, or even sturdy fabric pockets sewn onto a backing board.
The lids rest upright in each section, with their handles easily grab-able. The result is a clean, organized display—like a mini storage garage—where each lid is visible and easy to select.
You might opt for a painted or stained wood backing to match your kitchen decor, adding a touch of style while keeping the space functional. This setup reduces clutter on your countertop and makes stacking or searching for lids a thing of the past.
Starting is simple: measure your cabinet door, then cut or buy a suitable organizer. Attach it securely with screws, adhesive strips, or brackets, ensuring it remains sturdy during use.
Place your pot lids in the compartments, adjusting the spacing as needed. For added durability, seal or paint the organizer to match your kitchen’s aesthetic. In just a few hours, you’ll enjoy a more organized, clutter-free cooking space with lids that are easy to find and store.
25. Decorate with Textured Baskets and Cloth Liners for a Cohesive Look

Using textured baskets and cloth liners is a fantastic way to add warmth, texture, and visual harmony to your kitchen organization. These decorative elements elevate simple storage solutions, making your space feel stylish and inviting while keeping everything tidy.
Visualize a set of woven rattan baskets or fabric-lined wire bins placed on open shelves or countertop corners. The baskets come in natural tones like beige, taupe, or gray, offering a neutral palette that complements various decor styles.
Inside, soft cloth liners—perhaps in cotton or linen with subtle patterns or tassels—add a layer of comfort and refinement. These liners also protect delicate items from scratches and make it easier to remove and clean the contents.
The textured surfaces and layered textiles create a cozy, farmhouse, or boho vibe, giving your kitchen a cohesive, curated look that feels both functional and beautiful. To incorporate these decorative storage solutions, select baskets and liners that match your style and scale of the space.
Secure the liners inside the baskets with fabric glue or sew them for a tailored fit. Organize your smaller items—like utensils, napkins, or spice jars—within these baskets, arranging them on open shelves or countertops. The combination of natural textures and soft fabrics instantly elevates your kitchen decor, making organization feel like a stylish part of your home’s overall design.
Conclusion
With these creative DIY ideas, transforming your kitchen into a more organized, functional space has never been easier. From repurposing everyday items like wine crates and vintage suitcases to installing simple solutions like magnetic strips and drawer dividers, there’s a project for every level of skill and style.
Give these ideas a try, and enjoy the satisfaction of a beautifully tidy kitchen that simplifies your daily routines. Start today and turn chaos into calm—your dream kitchen is just a DIY away!
Leave a Reply