I have been, or can be if you click on a link and make a purchase, compensated via a cash payment, gift, or something else of value for writing this post. As an Amazon Associate, I earn from qualifying purchases. Please read my full Affiliate Disclosure for more information.
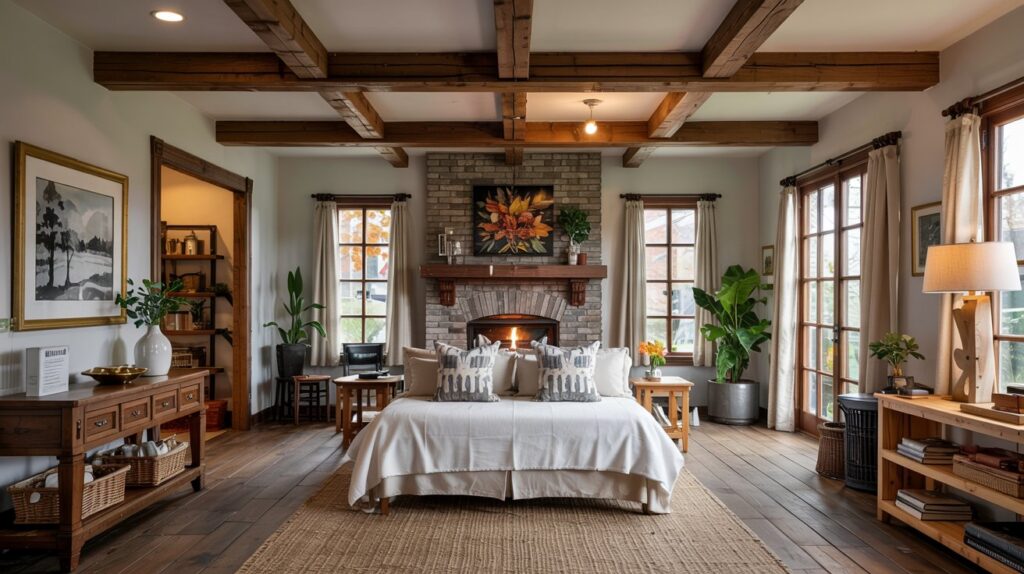
To integrate decorative beams for a rustic fall ceiling, pick beam styles that echo your room’s palette and architecture, then plan placement to guide sightlines and define zones without crowding the space. Decide between real wood or faux beams based on budget and maintenance, and finish with warm browns, ambers, or burnt oranges that deepen with light. Consider ceiling height for proportion and installation approach, then pair beams with fall textiles and lighting for cohesion—more tips await if you keep exploring.
Key Takeaways
- Choose beam styles and finishes that echo autumn colors and wooden textures to unify the room’s palette.
- Plan beam placement to guide sightlines, define zones, and balance rustic charm with visual flow.
- Decide between exposed or panel beams based on ceiling height, budget, and desired aesthetic.
- Select real wood for authenticity or faux beams for lighter weight and easier maintenance.
- Pair beams with warm textiles and lighting to highlight grain and create a cohesive Fall look.
Selecting Beam Styles to Complement Fall Decor
When selecting beam styles to complement fall decor, start by considering the room’s overall palette and the mood you want to create. You’ll choose beam styles that harmonize with existing architectural details and your color scheme. Prioritize proportion: lighter woods for intimate spaces, darker tones for dramatic rooms. Think about beams as decorative accents that set rhythm and texture, not overwhelming focal points. Consider beam placement to guide sightlines and define zones. For rustic charm, pair rough-hewn faces with smooth edges for balance. Guarantee finishes resist wear while enhancing grain. Clear decisions reduce clutter, delivering cohesive, practical impact.
Assessing Ceiling Height and Space for Beams
Ceiling height and available space set the limits and opportunities for decorative beams. You’ll assess how room height influences beam spacing, proportions, and visual impact. Start by measuring overall ceiling height, noting any sloped areas or soffits that affect placement. Consider whether beams should run parallel to joists or create a framing feature that highlights architectural lines. Space considerations include furniture layout, doorways, and lighting fixtures, ensuring beams don’t obstruct movement or sightlines. In low ceilings, opt for shallow profiles or staggered runs to create depth without crowding. Matching scale to room size sustains balance and cohesive rustic charm.
Choosing Materials: Real Wood vs. Faux Alternatives
When you’re choosing materials, weigh Real Wood’s authentic warmth and potential long-term value against Faux options that mimic grain with lower weight and easier maintenance. Consider how each choice fits your budget, durability needs, and the ceiling’s rustic vibe, keeping in mind room size, climate, and installation ease. This balance sets the stage for practical decisions on Real Wood Pros, Faux Pros & Cons, and how budget influences durability.
Real Wood Pros
Real wood brings natural warmth and texture that faux options endeavor to imitate, but it’s the real thing that reacts beautifully to lighting and aging. You’ll notice deeper depth in color and a tactile grain that reads as authentic. Wood grain variations create subtle, dynamic character, while knot patterns add rustic charm without overpowering the ceiling’s silhouette. Stability matters, so select kiln-dried stock and proper fasteners to minimize movement. Finish options—oil, stain, or matte polyurethane—control sheen and longevity. Honest material choices simplify maintenance, align with a rustic fall ceiling, and reward you with durable beauty over time.
Faux Pros & Cons
There are clear trade-offs between real wood and faux options, so weighing appearance, cost, and performance helps you decide what fits a rustic fall ceiling best. You’ll compare authentic grain and warmth with consistent color and easier handling. Faux options offer lighter weight, simpler beam installation, and lower upfront costs, but may lack subtle depth or live-edge character. Consider decorative motifs you want to express and how finishes read from below. In busy rooms, faux beams can reduce warping risk and maintenance. Choose materials that align with your priorities, ensuring durable, cohesive ceiling aesthetics without compromising your vision.
Budget & Durability
Budget and durability go hand in hand when choosing between real wood and faux beams. You’ll weigh cost against longevity, installation ease, and overall vibe. To help you decide, consider:
- Real wood: lasting warmth, authentic grain, higher upfront cost
- Faux options: lighter handling, budget-friendly, easy maintenance
- How lighting accents and wall color coordination influence perceived durability and style
Remember that the right choice supports a cohesive look, not just a trend. Prioritize solid construction, resistance to warping, and a finish that ages well with your ceiling’s fall palette. Choose thoughtfully for lasting impact.
Finishes and Stains That Bring Warmth to a Rustic Look
When you’re aiming for a warm, rustic ceiling, the right finishes and stains can transform plain wood into a cozy focal point. Start with a stable color palette that complements autumn tones—deep browns, dusky ambers, and soft, burnt oranges—and test samples in your space. Choose finishes that enhance grain and provide subtle depth, like matte or satin sheens. For lighting integration, select stains that hold color under varied light, avoiding over-saturation. Apply coatings evenly, keeping grain visible. Document your color choices, and pair finishes with prudent maintenance to preserve warmth and texture over time.
Planning Layout: Beam Configuration and Span
You’ll start by outlining a beam pattern strategy that complements your ceiling height and room flow. Next, relate span calculation basics to practical spacing, so every member supports the look and the load without overdoing joints. Finally, weave Rustic Layout Planning into the plan, balancing visual rhythm with structural efficiency for a cohesive result.
Beam Pattern Strategy
To plan an effective beam pattern, start by evaluating room shape, ceiling height, and desired focal points, then decide on a configuration that supports both structure and mood.
- Use symmetry or intentional asymmetry to guide eye movement and create harmony.
- Visualize how beams frame architectural features, aided by a clear beam pattern visualization process.
- Align beam directions with light sources and furniture layouts to enhance warmth and texture.
This approach keeps structure steady while elevating rustic charm, ensuring a coherent, practical plan that clarifies decisions and inspires confidence in your design. beam pattern strategy, beam pattern visualization
Span Calculation Basics
Span calculations put the plan into practice. You’ll determine beam spacing, orientation, and span lengths by checking structural rules and your room’s demands. Start with a clear layout: identify load paths, then assign load bearing beams to carry the ceiling weight and any fixtures. Consider joist spacing, decorative priorities, and any mid-span supports you’re comfortable adding. Use conservative spans to avoid sag, especially in longer runs. For each span, verify allowable deflection and load capacity with a simple formula or builder’s chart. Precision here keeps the look pristine and the structure safe, preserving both style and function.
Rustic Layout Planning
Carefully map your beam layout to balance rustic charm with structural confidence, starting by outlining where decorative beams will align with joists and load paths. You’ll optimize span and positioning to support lighting enhancements and color palette choices, ensuring seamless integration with existing structure. Focus on rhythm, symmetry, and hidden support where needed so beams read as deliberate design rather than afterthoughts.
- Visualize load flow to justify each beam’s placement
- Align beams with joists for cohesive lines and lighting effects
- Test spacing and color contrasts to reinforce warmth and depth
Installation Basics: DIY Tips or When to Hire a Pro
Installing beams yourself can save money and give you a hands-on sense of accomplishment, but deciding whether to DIY or hire a pro hinges on your space, tools, and comfort level. You’ll assess whether your ceiling needs temporary supports, weatherproofing, and fasteners suited to materials. If you’re leaning DIY, plan precise cuts, level placement, and secure anchoring. For pros, expect a faster finish and professional alignment. Consider lighting options—proper wiring and fixtures matter as much as the beams themselves. Ceiling height considerations affect both approaches: tall rooms may require scaffolding or lifts. Choose method based on safety, budget, and your confidence.
Pairing Beams With Fall Furnishings and Textiles
Pairing decorative beams with fall furnishings and textiles is where your room’s mood gets its seasonal voice. You’ll balance textures and tones to feel warm, cohesive, and inviting. Use three guiding ideas to shape perception:
1) lighting accents that spotlight grain and color
2) color palettes that echo wood, rust, and moss
3) scaled textiles that layer comfort without crowding space
Keep lines clean and finishes aligned, so beams remain the focal point. Pairing tips like these help you craft a portrait of autumn that’s practical, aesthetic, and easy to live with.
Maintenance and Seasonal Upkeep for Beamed Ceilings
Maintaining beamed ceilings is about simple, routine checks that protect both beauty and longevity. You’ll inspect for cracks, sagging, and any paint or stain wear seasonally, especially after temperature swings. Clean surfaces with a soft cloth and mild solution, avoiding harsh chemicals that could dull timber or paneling. Check ceiling paneling for gaps where dust can collect, and reseal edges if needed to maintain insulation and finish. For ceiling lighting, ensure fixtures are secure, cords neat, and bulbs match recommended wattage. Prevent moisture buildup by addressing leaks promptly, and schedule professional refinishing as beams show wear to preserve rustic charm.
Conclusion
You’ve learned how to pick beam styles, size up your space, and weigh real wood against faux options. With practical layouts, warm finishes, and seasonally styled textiles, you can craft a rustic ceiling that feels both cozy and timeless. Keep maintenance simple, plan around your ceiling height, and don’t overthink spans. When in doubt, hire a pro for mounting. Stay patient, measure twice, and enjoy the welcoming glow of your beamed autumn retreat.
Leave a Reply